Showing posts with label #stampinupdemonstrator. Show all posts

Tuesday, 23 January 2024

Ink Lift Floral - Water Lifting Technique

#waterliftingtechnique, #inklifting, #toawildrose, #stephaniefischer, #stampinupdemonstrator, #lusterspecialitypaper, #cardmaking, #coloringtechniques, #colouringtechniques
A trio of cards using the retired To A Wild Rose stamp set and water to lift colour.
The blue one is Misty Moonlight ink on Boho Blue Luster Speciality Paper
The other two cards have a base of gesso

I thought I'd go back to an old favourite of mine - colour lifting.  

If you've been around forever, like me, you'll remember heat embossing a design and then carefully applying bleach with an old paintbrush to lift the colour ... all while trying to ignore the horrible smell of the bleach and wearing old clothes in case of accidents!  But I did love the results of that technique!  I used to use bleach to paint little scenes for Christmas cards!

I have tried lifting the colour with water in the past, using coloured cardstock.  However, the coloured cardstock isn't designed to handle water and I haven't been keen on the results.  

But I've been experimenting again and am really happy with the results of two of my experiments: the first was using Luster Speciality Paper and the second was using a variety of cardstocks coated with gesso that I coloured with several drops of reinker.

#waterliftingtechnique, #inklifting, #toawildrose, #stephaniefischer, #stampinupdemonstrator, #lusterspecialitypaper, #cardmaking, #coloringtechniques, #colouringtechniques
The monochromatic approach gave a muted but elegant look to the project
Label is cut with die from the Delicate Forest die set (162679)

#waterliftingtechnique, #inklifting, #toawildrose, #stephaniefischer, #stampinupdemonstrator, #lusterspecialitypaper, #cardmaking, #coloringtechniques, #colouringtechniques
The tools and products I used for this project

A.  Water ink lift technique on Luster Speciality Paper 
For the blue card above, I used the Stampin' Up Luster Speciality Paper (151746).  The pack contains two 12" x 12" sheets each of the 2023-2025 In Colours and I chose to work with the Boho Blue.

The Luster paper has a coating which means that it can handle the water.  It does also mean, however, that ink tends to sit on top and needs patience or a heat tool to dry sufficiently.  I had so much fun I really thought it was worth it!  Depending upon how much water has been applied, the paper may warp a little - just pop it under something heavy for a while to help flatten it again.
  1. Apply a coat of ink all over the luster paper. 
    TIP: choose a shade that will provide sufficient contrast to the paper colour either in a similar colour for a monochromatic project or a different colour.

  2. Dry the ink thoroughly with a heat tool (or wait until it's dry)

  3. Use Stazon Jet Black ink (or alternative permanent, water-proof ink) to stamp the image. 
    TIP:  It's best to use a stamping platform because I have found that I always need to stamp the image at least 2 or 3 times to get an image that's dark enough. 
    TIP: The chosen image should have clear lines and be suitable for colouring. 
     
  4. Dry the ink thoroughly with a heat tool (or wait until it's dry)

  5. Use a brush to paint water onto the image, a section at time, and then blot with a clean piece of paper towel.  This will lift the ink from that area.  Repeat until you're satisfied with the amount of ink that's lifted.  You could use a Water Painter (151298) but I find this gives me less control than I like.
    TIP: Unless you want to transfer ink from one place to another, rinse the brush before each water application.
    TIP: To avoid accidents and finger prints, use a piece of paper towel to hold your project and under your working hand.  Moisture from your hands will also lift the ink.
    TIP:  for the more advanced or adventurous - try leaving some shadows (eg under petals) by varying the amount of ink that you lift and/or transferring some of the ink 
#waterliftingtechnique, #inklifting, #toawildrose, #stephaniefischer, #stampinupdemonstrator, #lusterspecialitypaper, #cardmaking, #coloringtechniques, #colouringtechniques
The Boho Blue Luster paper before and after adding the layer of  Misty Moonlight ink.

#waterliftingtechnique, #inklifting, #toawildrose, #stephaniefischer, #stampinupdemonstrator, #lusterspecialitypaper, #cardmaking, #coloringtechniques, #colouringtechniques
The work in progress, painting with water and then blotting to lift the ink


B.  Water ink lift technique on cardstock "altered" with coloured gesso (or uncoloured)

#waterliftingtechnique, #inklifting, #toawildrose, #stephaniefischer, #stampinupdemonstrator, #gessoandink, #cardmaking, #coloringtechniques, #colouringtechniques
For this card I used some drops of Crushed Curry reinker in white gesso for the undercoat
The top coat is Blackberry Bliss ink
  1. Transfer some white gesso to a small container - I find a little goes a long way and probably used about a dessertspoonful. 

  2. Add some colour - I used ink from my reinker botte, adding a few drops at a time.  Alternatively, you could use a little acrylic paint.  Mix well.

  3. Evenly paint the surface of your choice with the coloured gesso.  I've used Basic White cardstock (159228), Basic White Thick cardstock (159230) and Watercolour paper (149612) but you could try other surfaces too: eg cardboard, wood ...

  4. Allow the gesso to thoroughly dry.  Since I'm impatient, I used a heat tool to help it along!

  5. Follow steps 1 - 5 from the Luster Paper instructions above.
#waterliftingtechnique, #inklifting, #toawildrose, #stephaniefischer, #stampinupdemonstrator, #gessoandink, #cardmaking, #coloringtechniques, #colouringtechniques
This is the work in progress, having done one application of lifting to each petal without rinsing my brush.  This gave me a softer ink layer which made it easier to leave a few soft shadows

#waterliftingtechnique, #inklifting, #toawildrose, #stephaniefischer, #stampinupdemonstrator, #gessoandink, #cardmaking, #coloringtechniques, #colouringtechniques
I used the same gesso mix on Basic White cardstock with a top coat of Pretty Peacock ink

#waterliftingtechnique, #inklifting, #toawildrose, #stephaniefischer, #stampinupdemonstrator, #gessoandink, #cardmaking, #coloringtechniques, #colouringtechniques
I softened the ink on the flower, as above, by starting with one application of lifting one petal at a time but without rinsing my brush.  Then I worked each petal until I was satisfied with the result.

#waterliftingtechnique, #inklifting, #toawildrose, #stephaniefischer, #stampinupdemonstrator, #gessoandink, #cardmaking, #coloringtechniques, #colouringtechniques
I used the same gesso mix on Basic White Thick cardstock.  When dry, I sponged with Wild Wheat ink adding Early Espresso ink towards the centre. I stamped the flowers using the masking technique.  I also added some Memento Tuxedo Black ink below the flowers.

Thank you for visiting.  If you have any queries or comments, I'd love to hear from you!

'Til next time ....

Stephanie Fischer
The Crafty Thinker
Monday, 31 January 2022

Grassy Grove Calamity


www.thecraftythinker.com.au, Grassy Grove bundle, Mountain Air, Stampin Up Demonstrator, Stephanie Fischer,
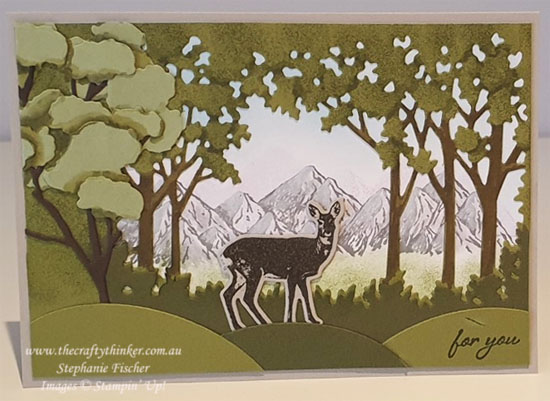
Grassy Gove Bundle paired with Mountain Air stamp set & Harvest Dies

The greatest joys that Stampin' Up has brought me are the wonderful and supportive people that I have met - mostly in a virtual way.   We have celebrated successes, inspired each other and in the bleaker times their messages have brought love, comfort and the knowledge that I'm not alone.  And then something really magical happens and a bond forged in mutual interests and creativity develops into a warm friendship that goes way beyond card-making. 

This card was inspired by my friend RaeDeen and I really wish I'd done a better job!!

My dislike of wastage is well-documented but the embarrassing step by step photos below (which I share as a cautionary tale!) are testament to the fact that a certain amount of planning is beneficial.  My lack of planning, and poor choice of left over bits of card to use, created unnecessary challenges that kept me problem-solving each step of the way!

'Til next time
Stephanie

I hereby invite you to have some fun at my expense!

www.thecraftythinker.com.au, Grassy Grove bundle, Mountain Air, Stampin Up Demonstrator, Stephanie Fischer,
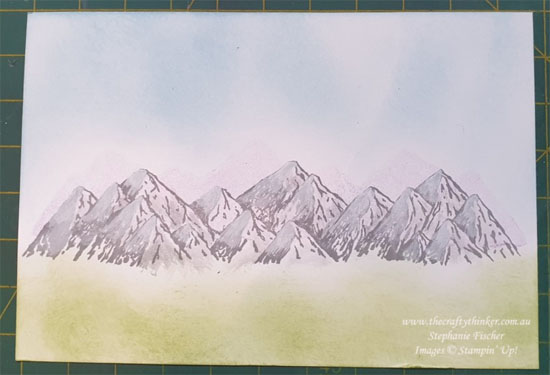
It started out OK with some sponging, white craft ink and the Mountain Air stamp

www.thecraftythinker.com.au, Grassy Grove bundle, Mountain Air, Stampin Up Demonstrator, Stephanie Fischer,
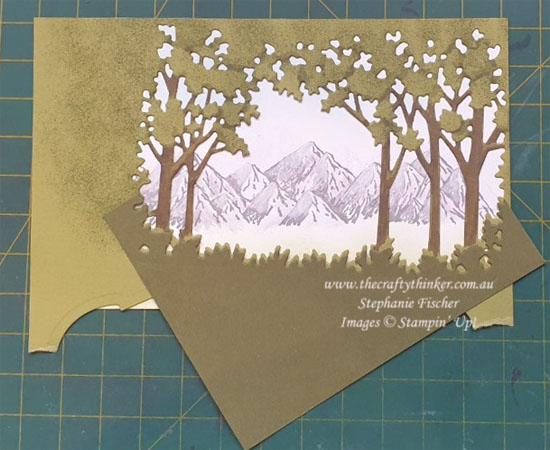
Having spent a few minutes kicking myself, I decided to rescue the piece rather than waste the card
so I proceeded to stipple the tree canopy with ink and colour the trunks with Stampin' Blends

www.thecraftythinker.com.au, Grassy Grove bundle, Mountain Air, Stampin Up Demonstrator, Stephanie Fischer,
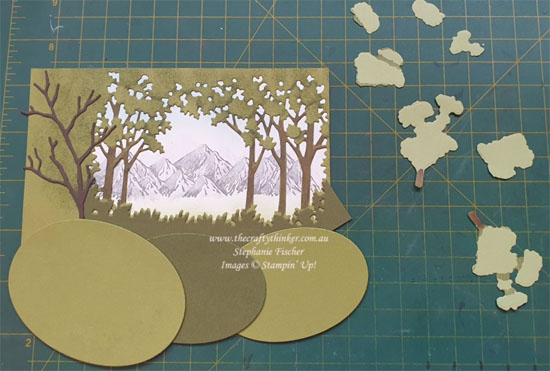
For my next blooper!  Clearly this was not the best piece of card to have used!  A few more bruises added to my shins, another decision to not waste the card and another rescue mission required!

www.thecraftythinker.com.au, Grassy Grove bundle, Mountain Air, Stampin Up Demonstrator, Stephanie Fischer,
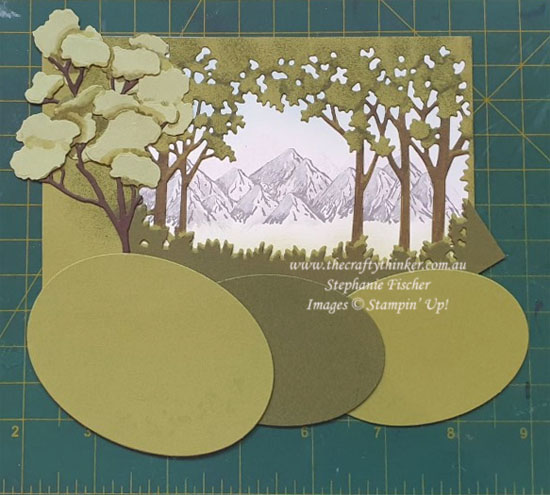
The ovals covered the problems at the lower extremity but that left a couple of problems to fix to the left of the card.  The Harvest dies seemed to offer the possibility of building a foreground tree with similar branches and canopy.

www.thecraftythinker.com.au, Grassy Grove bundle, Mountain Air, Stampin Up Demonstrator, Stephanie Fischer,
The "canopy" was looking a bit like a mess of green meringues so I tried to add some shading to bring it together a bit more.  I reckon I could have done a better job but at this point my problem-solving brain cells had rolled onto their backs with their legs in the air!


Wednesday, 26 January 2022

Crane of Good Fortune

www.thecraftythinker.com.au,Crane of Fortune,Stephanie Fischer,Stampin Up Demonstrator NSW
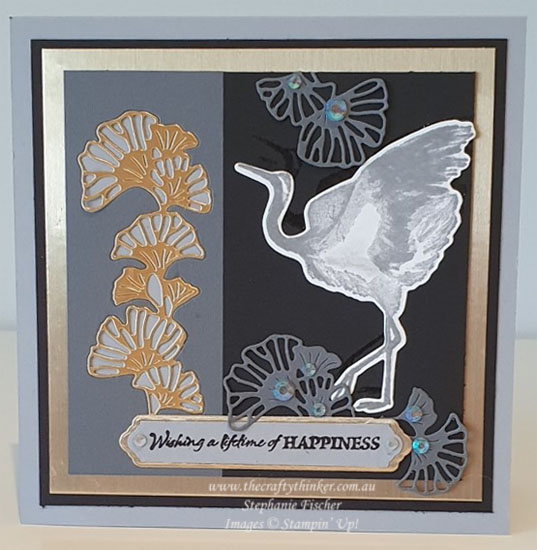
Crane of Fortune Bundle

I was immediately drawn to this distinktive stamp set in the Mini Catalogue January to June 2022.  But, there is something about the drawing that bugs me a bit - so today I added a bit of shading to the lower part of the wing and I think it helped a bit.  

I had experimented with clear embossing the crane onto black cardstock and decided that it didn't really work (I'm going to try it on Basic Gray though!).  As you might know, I hate to waste anything, so that unfortunate crane now forms a shadow behind the star of the card.

If you're wondering about that label: I used a die from the now retired (sorry!) Vine Design Bundle and trimmed it to the size I wanted.

'Til next time

Stephanie

Friday, 21 January 2022

In The Moment by the window


In The Moment, Stampin' Up, Masking, Stampin' Blends, Stephanie Fischer, www.thecraftythinker.com.au
In the moment stamp set

Oh dear, it's been a while, hasn't it!

I'm not going to make excuses - I've just been taking care of myself by removing the pressure to create, photograph and blog.  I've just returned to my craft room and am having fun with some new bits and pieces.

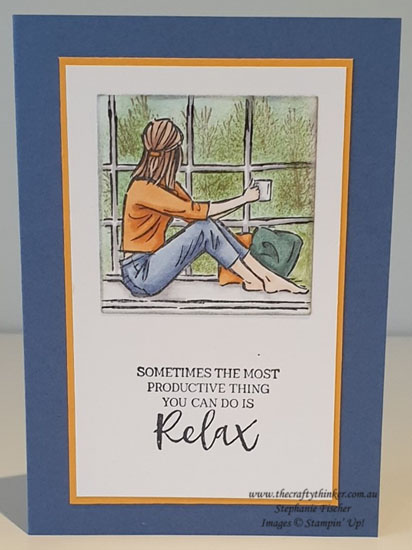
This is one of the images from the In The Moment stamp set.  

I stamped the image, masked it (yes, it was a little bit fiddly to cut out the window panes but not as bad as I had expected) and then stamped the trees from the Winter Woods stamp set.  I sponged the trees and sky before I removed the mask.  

Then I coloured the image with Stampin' Blends alcohol markers.

NOTE:
When I was making the mask - I extended the window panes.  Once I removed the mask, I simply extended the lines with a fine black pen.

I cut the little scene out with one of the Layering Square dies and sponged around the edges with some Smoky Slate ink.

Bye for now - I'll pop in from time to time when I feel up to tackling technology and feel I have something worthwhile to share.

See you then!

Stephanie
The Crafty Thinker