Showing posts with label Alcohol markers. Show all posts

Sunday, 19 November 2017

Bird Banter - Sneak Peek

Stampin' Up are very generous with the freebies for those who attend events!  One of the three stamp sets that I came home with from On Stage Local in the Gold Coast is called Bird Banter.  It has several cute little birds together with some funny and punny little greetings!
#thecraftythinker, #stampinup, #cardmaking, #sneakpeekoccasions2018, Toucan, Sneak Peek Occasions 2018, Bird Banter, Stampin' Blends, Stampin' Up Australia Demonstrator, Stephanie Fischer, Sydney NSW
Sneak Peek of the toucan from the Bird Banter stamp set in the 2018 Occasions Catalogue

I coloured this toucan with Stampin' Blends alcohol markers (my new go to colouring tool!) and then cut him out with one of the Stitched Shapes dies.  There isn't a black marker and the Dark Basic Gray wasn't dark enough, so I added a layer with the Dark Night of Navy marker.

The base card is Night of Navy to which I added a layer of Whisper White decorated with small pieces of the Naturally Eclectic Designer Series Paper and some Bermuda Bay Mini Chevron Ribbon.

The greeting is stamped with Night of Navy ink.

Thank you for visiting.
' Til next time!
Stephanie

Thursday, 16 November 2017

Stampin' Dreams Blog Hop - Favourite Technique: Monochrome Watercolour

Image may contain: text
Welcome to this month's Stampin' Dreams Blog Hop. You are currently visiting Stephanie Fischer from Australia. 

I hope you enjoy my project with the Theme: Favourite Technique.   Please remember to click on the next person in the line up at the end of my post to continue enjoying all the wonderful projects in the hop.

I really love to paint and colour - and a technique that has given me a lot of pleasure over the years is to paint a stamped image as a monochrome.  In the past I've always used watercolouring (examples here  and here) but for this hop I decided to extend myself a bit and try using the wonderful new Stampin' Blends alcohol markers to achieve a similar result.
#thecraftythinker, #stampinup, #cardmaking,#SDBH, #sneakpeekoccasions2018, You've Got This, Sneak Peek Occasions Catalogue 2018, Stampin' Up Australia Demonstrator, Stephanie Fischer, Monochrome with alcohol markers
If you're wondering about that gorgeous lacy die cut - it's a sneak peek of a die in the new Petals & More thinlits set.

I started out with a piece of Flirty Flamingo cardstock with the You've Got This flower stamped in Whisper White Craft Ink.  I then coloured the flower using the Stampin' Blends in Pink Pirouette Light, Calypso Coral Light and Calypso Coral Dark.
#thecraftythinker, #stampinup, #cardmaking, #sneakpeekoccasions2018, You've Got This, Sneak Peek Occasions Catalogue 2018, Stampin' Up Australia Demonstrator, Stephanie Fischer, Monochrome with alcohol markers
I tested the colours on a scrap of the cardstock

I cut the flower out with a square Stitched Framelit (using this technique to extend the shape) and layered it onto a piece of Powder Pink cardstock.  The base card is Flirty Flamingo with a layer of the Fresh Florals Designer Series Paper in Powder Pink.

I used Flirty Flamingo cardstock and one of the new dies in the Petals & More Thinlits (sneak peek!) to create the lovely lacy strip and added a label made with Powder Pink and Flirty Flamingo cardstock and the Stitched Shapes and Layering Ovals dies.  The greeting is from the Watercolor Wings stamp set using Cherry Cobbler ink, stamped off.

I hope this project may have inspired you & brightened your day. You are currently visiting Stephanie Fischer. Please hop through all of the people on the list below to see all of our projects. You don't want to miss any!

'Til next time!
Stephanie


Product List

Monday, 13 November 2017

You've Got This Blend

I'm currently having a great weekend in the Gold Coast - the highlight being On Stage on Saturday.  I'll share more information on that later in the week and I'll share sneak peeks from the upcoming Occasions Catalogue as soon as possible!
#thecraftythinker, #stampinup, #cardmaking, #stampinblends, Out of the Box, You've Got This, Stampin' Blends, Alcohol Markers, Stampin' Up Australia Demonstrator, Stephanie Fischer, Sydney NSW
My swaps for On Stage - I made several in each colour

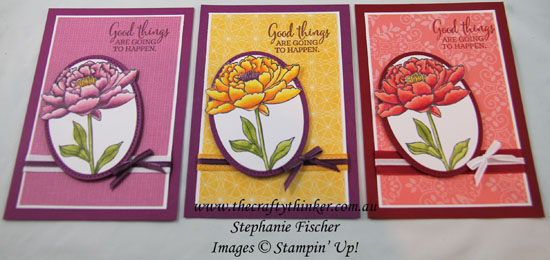
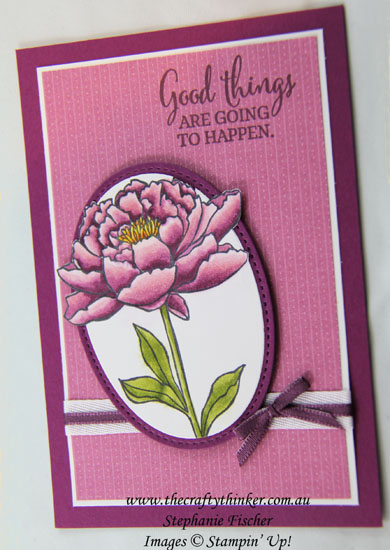
These are samples of the swaps I took with me to On Stage.  The You've Got This flowers are coloured with the new Stampin' Blends alcohol markers and cut out using the out of the box technique (keep scrolling down for a tutorial on that technique).
#thecraftythinker, #stampinup, #cardmaking, #stampinblends, Out of the Box, You've Got This, Stampin' Blends, Alcohol Markers, Stampin' Up Australia Demonstrator, Stephanie Fischer, Sydney NSW
Cherry Cobbler and You've Got This
I used four alcohol markers for each flower.  For the Cherry Cobbler version I used the Cherry Cobbler Stampin' blends as well as the Calypso Coral.
#thecraftythinker, #stampinup, #cardmaking, #stampinblends, Out of the Box, You've Got This, Stampin' Blends, Alcohol Markers, Stampin' Up Australia Demonstrator, Stephanie Fischer, Sydney NSW
Daffodil Delight You've Got This
For the Daffodil Delight version, I used the Pumpkin Pie markers as well as the Daffodil Delight pair.
#thecraftythinker, #stampinup, #cardmaking, #stampinblends, Out of the Box, You've Got This, Stampin' Blends, Alcohol Markers, Stampin' Up Australia Demonstrator, Stephanie Fischer, Sydney NSW
Rich Razzleberry You've Got This
For the Rich Razzleberry sample, I used team those two markers with the two Pink Pirouette markers.

Thank you for visiting.
'Til next time!
Stephanie

Product List
Out of The Box Technique Tutorial
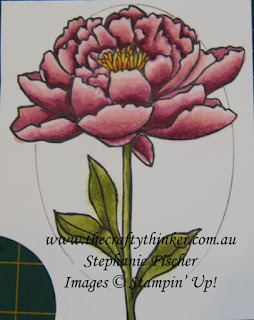
Out of the Box Technique - Step 1
Position your chosen die on your project and use a pencil to lightly draw around the inside of the die
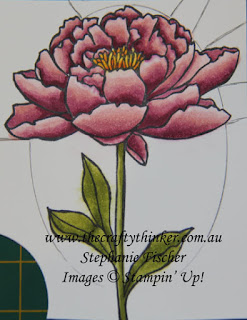
Out of the Box Technique - Step 2
Determine which parts will be outside of the die cut and, using your snips, cut straight up to those parts of the image - try to cut at a 90 degree angle to the image.
Note:  I had quite a few separate pieces sticking out of the die cut so there are quite a few cuts!
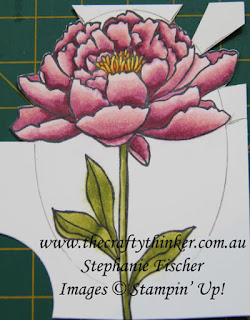
Out of the Box Technique - Step 3
Carefully fussy cut around the parts of the image that stick out from the pencil line (which is where the die will cut)

Out of the Box Technique - Step 4
Making sure that the cutting edge is facing down towards your project, slip the die underneath the parts of the image that will be outside of the die cut.  Tip:  You may need to turn the die to make this step easier and then straighten it once you've successfully slipped it under the necessary parts of the image.

Run the piece through your Big Shot (or similar die cutting machine) in the usual way.
Out of the Box Technique - Step 5 - the finished piece