Showing posts with label Botanical Builder. Show all posts

Sunday, 7 May 2017

Crazy Crafters Blog Hop with Special Guest: Lea Denton - Seasonal Layers Sneak Peek

Image may contain: text
 http://www.thecraftyspark.co.uk/2017/04/so-in-love-with-weddings-for-kylie.html
Click this image to visit Lea's blog
Welcome to the Crazy Crafters' Blog Hop with our Special Guest stamper, Lea Denton - we are thrilled to have Lea join us this month and so excited to CASE (Copy And Selectively Edit) any project that has been created by her . 
 
Whether you are starting the blog hop here at my blog, Stephanie Fischer - The Crafty Thinker, or have come from the person before me, be sure to click on the person listed under me further down the page to continue your journey on this blog hop.
Lea is such a talented and inspirational card-maker that it was hard to choose which project to CASE!  Eventually, however, I chose this.

I was asked to make a 30th Anniversary card for someone who likes pink.  Since it's the Pearl Anniversary, I made sure to add as many pearls as possible.  I actually made two cards  so that I could send one too - the other one can be seen here (but remember to finish making your way around this amazing blog hop!).

This card mixes retiring, current continuing and brand new products.
Lovely Laurel, Pearl Anniversary Card, Sneak Peek 2017 Annual Catalogue, Swirly Scribbles, #thecraftythinker, Stampin Up Australia Demonstrator, Stephanie Fischer, Sydney NSW
A Pearl Anniversary (that's 30!) card featuring retiring, continuing and brand new Stampin' Up products

To the basic Tip Top Taupe card (retiring) I added a panel decorated with more Tip Top Taupe, Powder Pink (new colour), Whisper White and Silver Foil Sheet.  

I cut the scallops with one of the dies in the new Seasonal Layers thinlits set.  Each colour is cut to butt up against its neighbours to give a flat finish.

To the pink section, I added some Silver Foil Sheet cut with the Swirly Scribbles Thinlits.

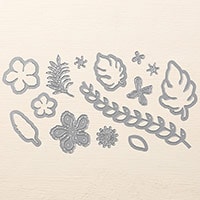
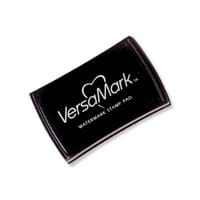
The flower is cut with the retiring (sob!) Botanical Builder framelits.  The Powder Pink layer is edged with Rose Red ink and the Whisper White layer is edged with Versamark and heat embossed with Silver.  The centre is a Metal Rimmed Pearl.
The leaves are cut from the new Lemon Lime Twist cardstock with a die from the new Lovely Laurel Thinlits.  The finished flower was adhered with a Stampin' Dimensional to the Rose Red label cut with another die from the new Lovely Laurel Thinlits.
Lovely Laurel, Pearl Anniversary Card, Sneak Peek 2017 Annual Catalogue, Swirly Scribbles, #thecraftythinker, Stampin Up Australia Demonstrator, Stephanie Fischer, Sydney NSW
The flower centre piece has some depth to it


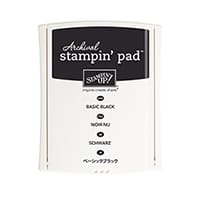
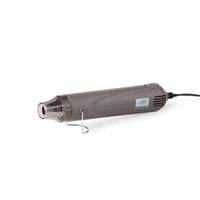
The banner and greeting at the top was stamped with Basic Black ink onto Silver Metal Foil.  They're from the new Happy Birthday Gorgeous stamp set and matches the Classic Label Punch. I was worried that the ink may smudge on the shiny surface of the foil sheet but I found it set well with a wave of the heat tool.

I hope you've enjoyed this card and I welcome your comments. 

Thanks for following our blog hop. Remember that currently you are at my blog - Stephanie Fischer - so click on the next name in the list to ensure that you don't miss out of seeing any of the blogs and the amazing inspiration they contain.

Thanks for visiting
'Til next time
Stephanie


Product List 

Friday, 3 March 2017

Dragonfly Dreams Inside the Lines


Image may contain: textThis card is entered into this week's Crazy Crafters Project Highlights.  Click here to see all the other great entries and vote for your favourites.

Thank you to everyone who so kindly voted for this card - I'm so proud to display this badge! 


I had some Inside the Lines paper already coloured in ('cos it's just so much fun to colour!) with watercolour pencils and was trying to think of ways to use it.  I had decided to combine it with a dragonfly and then then I saw a lovely card by Sharon Hashimoto Burkert where she placed a dragonfly over a circular, framed cutout and thought "bingo!"


www.thecraftythinker.com.au, Inside the Lines, fun fold, Detailed Dragonfly, #thecraftythinker, Stampin Up Australia Demonstrator, Stephanie Fischer, Sydney NSW, Tutorial Stiched Shapes rectangles
When closed, the various layers provide a lot of depth to the little scene

This is basically a tri-fold card with holes in it!  I cut an A4 piece of Old Olive cardstock to 28.5cm (because that was easily divisible by 3!) by cm and scored the long side at 9.5cm and 19cm.
www.thecraftythinker.com.au, Inside the Lines, fun fold, Detailed Dragonfly, #thecraftythinker, Stampin Up Australia Demonstrator, Stephanie Fischer, Sydney NSW, Tutorial Stiched Shapes rectangles
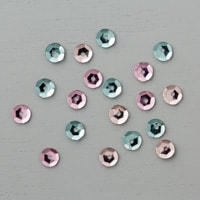
A few scattered sequins break up the expanse of Melon Mambo

I cut Melon Mambo panels to size and adhered them to the card.  I cut one a little narrower so that Icould include a small strip of Designer Series Paper on one side without adding to the thickness of the card.
www.thecraftythinker.com.au, Inside the Lines, fun fold, Detailed Dragonfly, #thecraftythinker, Stampin Up Australia Demonstrator, Stephanie Fischer, Sydney NSW, Tutorial Stiched Shapes rectangles
I was in a symmetrical mood, so I reversed one of the leaves!

I then used the second largest of the Layering Circles Framelits to cut a hole in one of the side panels.  I fold the card with the other panel underneath and lightly drew around the circle to help me position the framelit to cut the matching hole in the other flap.  

I then closed that flap over the centre (inside) of the card with the Whisper White layer loosely but carefully in position and drew around the circle to help me position the framelit and cut out a matching circle in that layer too.

I used the same framelit to cut out my coloured piece, adhered the Whisper White panel and then glued the coloured circle inside the cutout so that it was all one level.

www.thecraftythinker.com.au, Inside the Lines, fun fold, Detailed Dragonfly, #thecraftythinker, Stampin Up Australia Demonstrator, Stephanie Fischer, Sydney NSW, Tutorial Stiched Shapes rectangles
The Inside The Lines paper always looks gorgeous, no matter what you do with it!

I used the same largest circle framelit to cut Always Artichoke cardstock and then carefully aligned the second largest framelit on those circles to cut frames.  I found this gave me the best result because when I tried to cut them at the same time, they overlapped a bit and gave me an uneven result.

I glued the frames into position and then added the foliage, label and dragonfly.  I cut the dragonfly twice, once in Basic Black and once in Basic Gray, and glued them together partly for strength and partly for a bit of shading - they're very slightly offset.

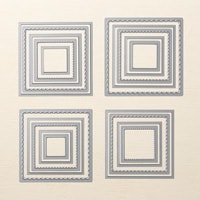
I stamped the greeting for the front of the card in Basic Black ink onto Whisper White cardstock and then cut it out in a rectangular shape with one of the square Stitched Shapes Framelits.  To achieve that look, line up the framelit but only partially cut with it.  The easiest way to do that is to place the top cutting plate as shown below, so that it only covers the part you want to cut.

www.thecraftythinker.com.au, Inside the Lines, fun fold, Detailed Dragonfly, #thecraftythinker, Stampin Up Australia Demonstrator, Stephanie Fischer, Sydney NSW, Tutorial Stiched Shapes rectangles
This photo was taken after the first run through the Big Shot.

Remove the framelit, turn it 180 degrees (upside down) on your project and position it carefully.  If you wiggle it as you position it, you'll be able to feel when it lines up properly.  Then position the top plate over the part of the framelit you want to cut and run it back through the Bigshot.
www.thecraftythinker.com.au, Inside the Lines, fun fold, Detailed Dragonfly, #thecraftythinker, Stampin Up Australia Demonstrator, Stephanie Fischer, Sydney NSW, Tutorial Stiched Shapes rectangles
Lined up and read to go, the cutting plate is only covering part of the die

In my photo, you'll see that my cutting plates have seen a lot of action!
www.thecraftythinker.com.au, Inside the Lines, fun fold, Detailed Dragonfly, #thecraftythinker, Stampin Up Australia Demonstrator, Stephanie Fischer, Sydney NSW, Tutorial Stiched Shapes rectangles
The finished result - a rectangular label from a square framelit
Thank you for visiting.
'Til next time!
Stephanie

Product List - To visit my online store, click on one of the product images below (Australian Residents only)

Sunday, 27 November 2016

Crazy Crafters Blog Hop - 27 November - Guest Cindy Schuster


Welcome to the Crazy Crafters Blog Hop with our Special Guest stamper, Cindy Schuster - we are thrilled to have Cindy join us this month and so excited to CASE (Copy And Selectively Edit) any project that has been created by her . Cindy is on the Artisan design team and has been selected for three years running!! What an incredible achievement!   We hope you find great inspiration from the projects.

This is Cindy's beautiful card that inspired me.
Whether you are starting the blog hop here at my blog, Stephanie Fischer - The Crafty Thinker, or have come from the person before me, be sure to click on the person listed under me further down the page to continue your journey on this blog hop.
 
Knowing that this very talented lady is on the 2015-2016 Artisan Design Team gave me an inkling that choosing a card to CASE might be tricky but it turned out to be even more difficult than I anticipated! 

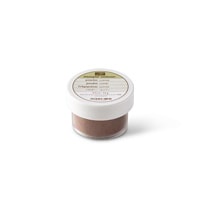
I love the way that Cindy heat embossed and coloured the Fancy Frost DSP so I decided to use my favourite ... Copper embossing powder and combined it with Dapper Denim for a change.
Stampin Up, #thecraftythinker, #CrazyCraftersBlogHop, Botanical Builder, Fancy Frost DSP, Swing Fold, Stampin Up Australia Demonstrator, Stephanie Fischer, Sydney NSW
Copper embossed Fancy Frost paper inspired by Cindy Schuster

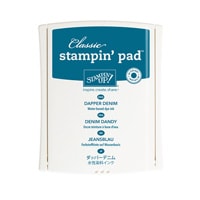
Using a light touch, I swiped a Versamark pad across the Fancy Frost paper, sprinkled with the copper embossing powder and heat embossed.  I then sponged with Island Indigo ink followed by a very light touch of Dapper Denim over the raised areas.  I then cut the piece to size and sponged the edges with Dapper Denim ink.
Stampin Up, #thecraftythinker, #CrazyCraftersBlogHop, Botanical Builder, Fancy Frost DSP, Swing Fold, Stampin Up Australia Demonstrator, Stephanie Fischer, Sydney NSW
Every angle gives a new view
I then made a swing fold card using Dapper Denim cardstock.  I added my Fancy Frost paper to the centre front and a frame of Copper Foil Sheet.  I used the Botanical Builder Framelits to create the floral decorations with Copper Foil Sheet, Dapper Denim and Marina Mist cardstocks.  I used Fancy Frost sequins for the centres of the flowers.
Stampin Up, #thecraftythinker, #CrazyCraftersBlogHop, Botanical Builder, Fancy Frost DSP, Swing Fold, Stampin Up Australia Demonstrator, Stephanie Fischer, Sydney NSW
Swing cards are a fun fold that looks good from any angle
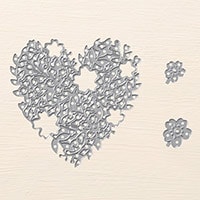
I adhered a piece of Marina Mist cardstock to the inside back of the card and stamped a greeting from the Tin of Cards stamp set in Basic Black ink.  I added some little Copper Foil blossoms that were cut with the Bloomin' Heart Thinlits.
Stampin Up, #thecraftythinker, #CrazyCraftersBlogHop, Botanical Builder, Fancy Frost DSP, Swing Fold, Stampin Up Australia Demonstrator, Stephanie Fischer, Sydney NSW
The combination of Dapper Denim and Copper is very elegant
  
The other part of the card, I decorated with the remainder of my Fancy Frost paper and a greeting from the Hostess stamp set called Gift of Love.
Stampin Up, #thecraftythinker, #CrazyCraftersBlogHop, Botanical Builder, Fancy Frost DSP, Swing Fold, Stampin Up Australia Demonstrator, Stephanie Fischer, Sydney NSW
Whilst not copper in colour, the Fancy Frost Sequins go very well with this colour scheme
 
Stampin Up, #thecraftythinker, #CrazyCraftersBlogHop, Botanical Builder, Fancy Frost DSP, Copper, Stampin Up Australia Demonstrator, Stephanie Fischer, Sydney NSW

I used this greeting because it epitomises my friend - she is so incredibly loving, nurturing and caring that it's a wonderful gift that she gives to the world.  I stamped it onto Soft Sky cardstock and cut it out with one of the new Stitched Shapes Framelits whch I layered onto a piece of Copper Foil cut with one of the Layering Squares Framelits and added a couple more of the Bloomin' Heart little blossoms. 
Stampin Up, #thecraftythinker, #CrazyCraftersBlogHop, Botanical Builder, Fancy Frost DSP, Copper, Stampin Up Australia Demonstrator, Stephanie Fischer, Sydney NSW
A close up of the Botanical Builder floral arrangement


I hope you've enjoyed this card and I welcome your comments. 

Thanks for following our blog hop. Remember that currently you are at my blog - Stephanie Fischer - so click on the next name in the list to ensure that you don't miss out of seeing any of the blogs and the amazing inspiration they contain.

Thanks for visiting
'Til next time
Stephanie
 
Product List - To visit my online store, click on one of the product images below (Australian Residents only)