Showing posts with label Paper-piecing. Show all posts

Wednesday, 20 March 2019

Butterfly Beauty in a Tea Room

This is one of those cards that developed itself - it's nothing like what I started out to create!
#thecraftythinker #stampinup #butterflybeauty #cardmaking #paperpiecing , Butterfly Beauty, Paper Piecing, Stampin' Up Australia Demonstrator, Stephanie Fischer, Sydney NSW
Paper Piecing adds to the dramatic effect of the gorgeous Butterfly Beauty Thinlits dies
The size of the base card is 9.5" x 6.25" folded in half at 4.75".  This larger than I normally make but allows for the size of the butterfly die-cuts.

The base card is Crushed Curry to which I added a layer from the Tea Room Specialty Designer Series Paper.  The greeting is from the Itty Bitty Greetings stamp set cut out with one of the dies in the Stitched Labels set layered onto a circle cut with the Layering Circles set.

I then proceeded to cut the butterflies using the Butterfly Beauty Thinlits.  I cut the "base layer" twice; once from Crushed Curry and once from Cajun Craze cardstock.  The "top" layer I cut from Pool Party cardstock.

I paper pieced the bottom two layers.  This is not difficult - just a bit time consuming.  Anyone who enjoys puzzles will enjoy paper-piecing.  Then I placed the Pool Party layer on top.  Finally, I fussy cut the bodies from the Cajun Craze piece and attached them to the top layer.

I used a Cajun Craze Stampin' Write Marker to colour in some of the little details that I couldn't paper-piece.

Having added some Faceted Dots, I used a Dark Pool Party Stampin' Blend alcohol marker to add a shadow around the edge of the butterflies.
#thecraftythinker #stampinup #butterflybeauty #cardmaking #paperpiecing , Butterfly Beauty, Paper Piecing, Stampin' Up Australia Demonstrator, Stephanie Fischer, Sydney NSW
Paper Pieced Butterfly Beauty - easy but time-consuming
TIPS FOR EASY PAPER PIECING:
  • Using the Precision Base Plate in the Big Shot will provide a nice clean cut (I keep a rather mangled looking cutting pad to use exclusively with the Precision Plate which is very hard on the acrylic standard cutting pads).
  • Once cut, I handle the die and paper very gently to try to keep everything in position.  This makes it easier to identify pieces and where to glue them.
  • The Paper-Piercing Tool is really useful for pushing out just the piece you want to glue.
  • The Fine-Tip Glue Pen is a good tool for adding dots of glue where you need them with precision.
  • I love the Take Your Pick tool for picking up and positioning those little pieces of card
Thank you for visiting.
'Til next time!
Stephanie

Product List - All supplies available for purchase in my online store

Sunday, 8 July 2018

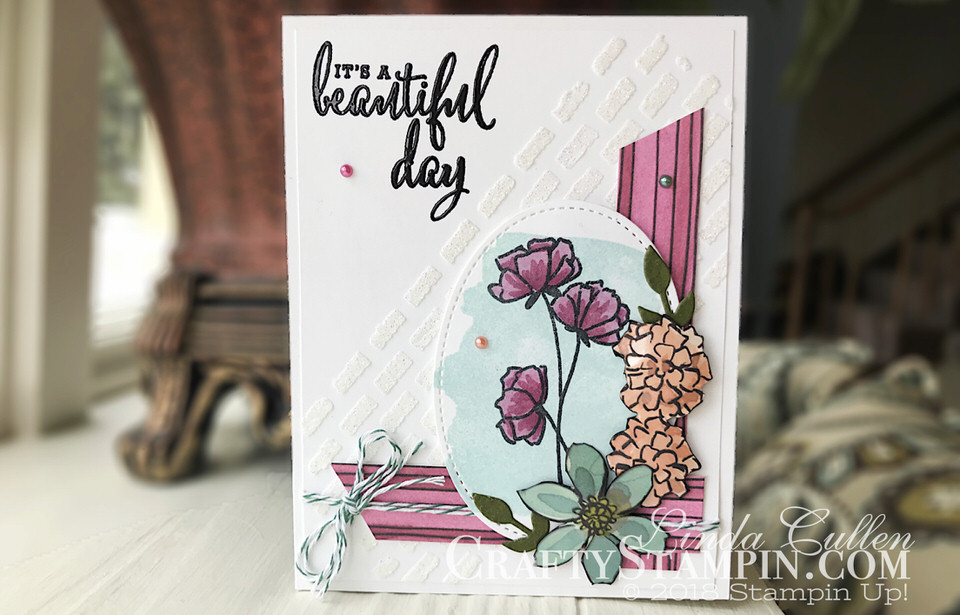
Crazy Crafters Blog Hop with special guest: Linda Cullen

Image may contain: text
Welcome to the Crazy Crafters' Blog Hop with our Special Guest stamper, Linda Cullen - we are thrilled to have Linda join us this month and so excited to CASE (Copy And Selectively Edit) any project that has been created by her.

Click this image to visit Linda's blog
Whether you are starting the blog hop here at my blog, Stephanie Fischer - The Crafty Thinker, or have come from the person before me, be sure to click on the person listed under me further down the page to continue your journey through the blog hop.

Linda is so talented that I had a HUGE short list of her projects and it was really difficult to choose one - but eventually I narrowed it down to this one based on the layout.

So here's my version:
#thecraftythinker  #stampinup  #cardmaking  #botanicaltags #crazycraftersbloghop , Botanical Tags, Rooted In Nature Bundle, Broadway Bound paper, Stampin' Up
Black, gold and soft suede: a multipurpose card suitable for any gender or occasion

Step 1 was to black heat emboss the greeting from the Rooted In Nature stamp set.  I then placed the soft suede card topper into the Sparkle embossing folder at an angle and partially ran it through the Big Shot .

Step 2 I cut a strip of Broadway Bound Designer Series Paper and trimmed it at an angle into two pieces which I adhered to the card top.

Step 3 I added pieces of the Mini Sequin Trim in gold and the 1/8" Black Cord and fastened it to the back with some sticky tape.

Step 4  I glued the card front to the basic black base card.

Step 5 I used the Natures Roots Framelits to cut and emboss three leaves which I swiped with a Versamark pad and then Gold heat embossed.  I then glued them to the card top.

Step 6 I cut the Botanicals Tag in both gold foil sheet and black cardstock, having first applied some Multipurpose Adhesive Sheet to the back for easy application to the card.

Step 7  Having adhered the gold flower outline to the card front, I paper pieced the little black pieces from the other die cut and then added a black Faceted Dot to the centre.
#thecraftythinker  #stampinup  #cardmaking  #botanicaltags #crazycraftersbloghop , Botanical Tags, Rooted In Nature Bundle, Broadway Bound paper, Stampin' Up
The leaves sit over the top of the trims which provides some dimension to the card

Thanks for following our blog hop.  Remember that currently you are at my blog - Stephanie Fischer - so click on the next name in the list to ensure that you don't miss out on seeing any of the blogs and the amazing inspiration that they contain.

Thanks for visiting.
'Til next time!
Stephanie

Product List - all products required for this card are available in my online store for Australian Residents

Friday, 12 May 2017

Eastern Beauty Floral

This card is included in the Crazy Crafters Project Highlights this week.  Click here to see all the beautiful cards and vote for your favourites.

I just can't stop using the Eastern Beauty Bundle - it's so amazingly versatile and fun to use!  On this card, I've paired it with some paper-pieced leaves created with the Rose Garden thinlits. 
Floral card, Paper-piecing, Sneak Peek, Eastern Beauty Bundle, In-Colours, #thecraftythinker, Stampin Up Australia Demonstrator, Stephanie Fischer, Sydney NSW
I paper-pieced half of the medallion to continue the Tranquil Tide colouring

When I first saw the new In-Colour, Lemon Lime Twist, my reaction wasn't very favourable.  I thought it was too bright, acidic and well - green.  I thought to myself "there's a colour I'll never use!".  So now I'm officially eating my words!  I still dislike the colour on its own but I concede that it adds the perfect pop of "zing" to many colour combinations.  I can see that, in fact, I'll be using it quite a lot!

More new favourites of mine are the Glitter Enamel Dots!

The greeting is a combination of the the banner from Banners For You and the "Best Wishes" from .  The advantage of photopolymer being that I could bend the words to fit the banner. 
Floral card, Paper-piecing, Sneak Peek, Eastern Beauty Bundle, In-Colours, #thecraftythinker, Stampin Up Australia Demonstrator, Stephanie Fischer, Sydney NSW
My new go-to birthday greeting is from the new stamp set "Happy Birthday Gorgeous"
Inside the card I stamped a couple of leaves from the Happy Birthday Gorgeous set using the new In-colour Tranquil Tide and coloured them with Lemon Lime Twist.  I then added another little flower made with the Eastern Beauty bundle.

Sneak Peeks included in this card:
  • Eastern Beauty Bundle (Eastern Medallions Thinlits, Eastern Beauty stamp set)
  • Fresh Florals Designer Series Paper Stack (Berry Burst colour used)
  • 2017-2019 In-Colour cardstock pack (Tranquil Tide, Berry Burst and Lemon Lime Twist used)
  • Tranquil Tide ink pad
  • Berry Burst ink pad
  • Lemon Lime Twist Stampin' Write Marker (2017-2019 In-Colour pack of markers)
  • Happy Birthday Gorgeous stamp set
  • Glitter Enamel Dots
Thank you for your visit.
'Til next time!
Stephanie

Product List - To visit my online store, click on a product image below (Australian Residents only)