Welcome to the Crazy Crafters' Blog Hop with our Special Guest stamper,Rachel Tessman - we are thrilled to have Rachel join us this month and so excited to CASE (Copy And Selectively Edit) any project that has been created by her.
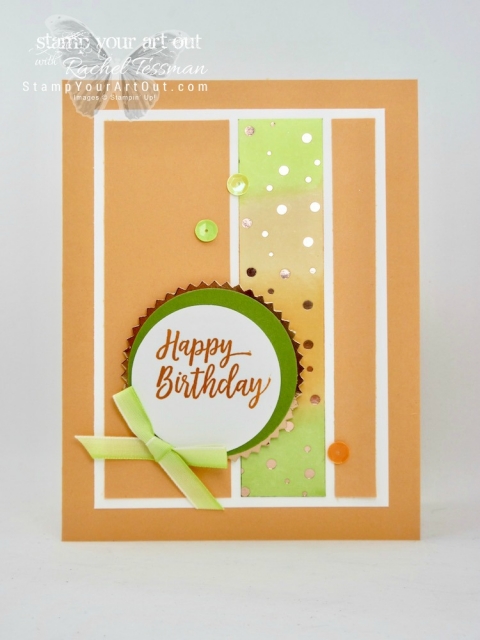
Click the image to visit Rachel's blog post
Whether you are starting the blog hop here at my blog, Stephanie Fischer - The Crafty Thinker, or have come from the person before me, be sure to click on the person listed under me further down the page to continue your journey through the blog hop. I chose to CASE this pretty card because I felt its simple layout would lend itself well to showcasing a new 2018-2020 In Colour and a sneak peek of a gorgeous new Designer Vellum.
Graceful Glass Vellum and Blueberry Bushel - one of the gorgeous new 2018-2020 In-Colours
This card features one of the new In-Colours called Blueberry Bushel and the stunning printed vellum pack of papers called Graceful Glass which is from the Graceful Glass Suite. In the next few days I'll be sharing a card I've made using the matching Stained Glass Thinlits dies.
The Graceful Glass Vellum has been coloured on the back with Stampin' Blends alcohol markers
Since I don't yet have Stampin' Blends in the In-Colours, I've used some of my existing ones. It's not a total match but it'll do!
I've placed Whisper White card behind the vellum pieces to show them to their best advantage. I adhered the strip by sponging a light coat of Liquid MultiPurpose Glue to the back of the vellum. To adhere the square, I used glue dots strategically placed behind the embellishments.
The inside of the card is decorated with the matching Painted Glass stamp set
I decorated the inside of the card using the matching Painted Glass stamp set and used one of the four greetings - love that font! I'll be sending this card, with a little gift, as a thank you to a customer.
Thanks for following our blog hop. Remember that currently you are at my blog - Stephanie Fischer - so click on the next name in the list to ensure that you don't miss out on seeing any of the blogs and the amazing inspiration that they contain.
Thanks for visiting.
'Til next time!
Stephanie
Current Product List - all available in my online store by clicking on one of the images below
After my previous Peak A Boo appeared in one of my posts, several people asked me for a tutorial - so I'm happy to say that today's card is the end result of a video tutorial! Click here to see the video.
I changed the layout and sizes a little but it's the same basic methodology.
The main image combines the stamp sets: Timeless Textures and the brand new set Sitting Here
Thank you again to Norma Lee at Splitcoaststampers from whom I learned about Peak A Boo cards!
As the card is opened, the dog becomes a cat!
I chose the colour of the cardstock for the card based entirely on name - what better for a Peak A Boo card than Peakaboo Peach?!! Then I ran into trouble trying to quickly (I was on a mission!) find decorative paper to go with it! Under normal circumstances, I'm sure I would have chosen a different colour scheme but, hopefully, the video will successfully show how I make a Peak A Boo card with the window in the corner and all will be forgiven!
I cut the windows and frames with the new Layering Squares Framelits that will be released on 1st June with the launch of the new Annual Catalogue. I love the fact that this set allows for many combinations: straight edges, scalloped edges and many sizes. There are 19 (I know - a nightmare for a pedantic person like me!) framelits in the set which can be mixed and matched.
I'm not in love with the colour comibination - I was trying to make the video quickly!
The windows I cut are 2 1/8" and I combined that framelit with the 2 1/2" scalloped framelit for the frame. The layers for the "For You" greeting are: 2 1/8" scalloped square and 1 7/8" straight sided square.
Inside the card I used an offcut of Whisper White cardstock that I trimmed to 4" x 2 5/8" and decorated with the flourish from the Timeless Textures stamp set (in Peak A Boo Peach, stamped off). This will be my panel to write my message to the recipient of this card.
This angle gives a better idea of how the card fits together
Another view to give an idea of the mechanism and how to attach the pieces.
I have added some diagrams below for those who prefer the written to the video. It looks more complicated than it is!
Instructions:
I cut three pieces of Peak A Boo Peach cardstock: Piece 1: 9.5" x 4.75"; Piece 2: 9" x 6" and Piece 3: 6.25" x 6"
Score Piece 1 in half at 4.75" and fold
Score Piece 2 at 3" (along the long side) and fold back on the left side
Score Piece 3 at 6" and fold back the 1/4" tab
I adhered the patterned card to these pieces in positions A, B and D in the diagrams above.
Turning Piece 2 to the back, I positioned the square die with the blade up against the edge of the folded over card in the lower right quadrant.
Then I placed the folded Piece 1 under Piece 2, with the cut edges lined up, and drew around the edges of the window I had cut. Removing Piece 2, I used the pencil lines to position the square die (with the piece still folded) and cut a window in the first layer. Opening up Piece 2, I then positioned the square die in the groove left from the first pass through the Big Shot and cut the last window.
I refolded Piece 1 and put adhesive over the front. Lining up the windows and the cut edges, I then adhered this to the back of Piece 2.
I made three frames from Peak A Boo cardstock and glued them into position.
I cut a Peak A Boo mat for the front of the card using a 2 1/8" scalloped square die.
I cut a piece of Whisper White cardstock with a 1 7/8" square die, stamped it and adhered it to the scalloped square.
I added adhesive to the tab on Piece 3 and adhered the tab to the cut edge on the back of the folded Piece 1.
I cut a piece of Whisper White cardstock to 5 1/2" x 2 1/2" and glued this to this inside of the flap on Piece 2 (position C). I then folded the card so that this panel showed through the window and stamped my images (for a larger image, I would lightly draw pencil marks to define the frame area, arrange the card so that the panel was unobstructed and then stamp my image).
I cut a piece of Whisper White cardstock to 5 1/2" square and adhered it to the inside of the back flap (Piece 3). I then folded the card so that this panel showed and stamped my image.
The finished card is 6" square. Thank you for your visit - Click here if you'd like to see the video tutorial for the peak A Boo card. 'Til next time Stephanie Product List - click an image to shop in my online store
