Showing posts with label 2015-16 Stampin' Up Catalaogue. Show all posts

Sunday, 17 April 2016

Crazy Crafters April 17th Blog Hop - CASE-ing Brian King


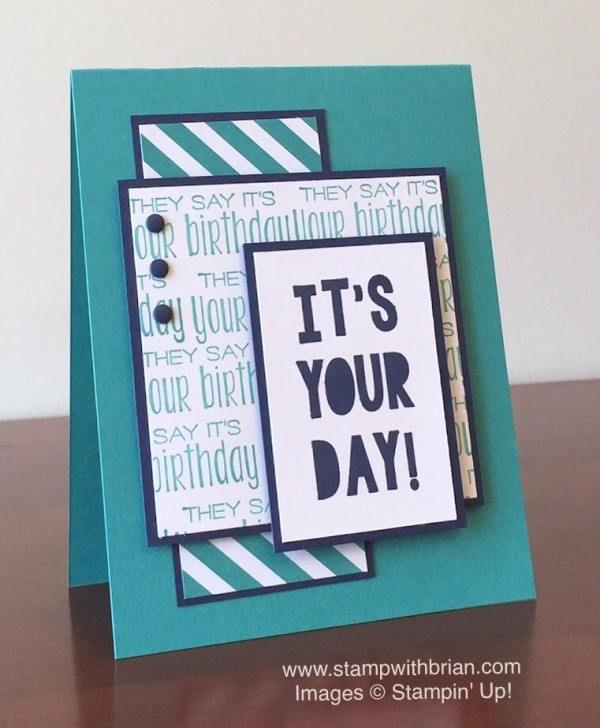
Suite Sayings, Party with Cake, Stampin' Up!, Brian King, Birthday Card
Click on the image to link to Brian's blog
Welcome to the Crazy Crafters Blog Hop with our Special Guest stamper, Brian King - we are thrilled to have Brian join us this month and so excited to CASE (Copy And Selectively Edit) any project that has been created by him.  We hope you find great inspiration from the projects.
Whether you are starting the blog hop here at my blog, Stephanie Fischer - The Crafty Thinker, or have come from the person before me, be sure to click on the person listed under me further down the page to continue your journey on this blog hop.

This is the card by Brian that I have chosen to CASE. The layering really appeals to me and I like the simplicity of the colour scheme.

SU, You've Got This, Watercolouring, Crazy Crafters Blog Hop, CASE Brian King
It's a girly version!
The first thing I did was to stamp and watercolour part of the beautiful floral image from You've Got This (I omitted the stem and leaves).  I stamped it with Blushing Bride ink onto Blushing Bride cardstock and then watercoloured it with Blushing Bride, Rose Red and Cherry Cobbler inks.  Although I used several ink colours, the basic method I used was the same as I use for monochrome watercolouring.  The links to my video tutorials can be found on my Video Tutorial page (see the tabs above)

I decided to make my card and mats for the layers in Cherry Cobbler cardstock.  I cut a 12" square piece of Cherry Cobbler to 6" x 5.25" and folded it in half.  Then I cut a Blushing Bride layer 1/8" smaller.

I decided on the sizes for the rest of the layers by first trimming the flower to as narrow a strip as possible and then creating balanced layers from that measurement.  All the mats are 1/8" larger than the patterned pieces.

Once I'd trimmed the painted flower layer to size, I added a greeting from Butterfly Basics, stamped with Basic Black ink.
SU, You've Got This, Watercolouring, Crazy Crafters Blog Hop, CASE Brian King
Close up of the watercoloured panel

Brian took a lot of trouble to stamp the middle layer of his card but I decided to take the opportunity to use some beautiful Designer Series Paper and chose a couple of patterns from the Birthday Bouquet DSP.

The candy dots I used are Cherry Cobbler from the Regals set.

Knowing that Brian is fond of dimension, I used LOTS of dimensionals to adhere the layers to the card!
SU, You've Got This, Watercolouring, Crazy Crafters Blog Hop, CASE Brian King
Lots of dimensionals to honour Brian!

Sizes for the layers:

Bottom layer:   Mat    2" x 53/8"                           DSP  17/8" x 51/4"
Middle layer:    Mat   41/2"x 43/8"                        DSP   43/8x 41/4"
Top layer:         Mat   25/8" x 37/8                       DSP   21/2" x 33/4

To purchase from my online store, click on one of the product images below.

I hope you've enjoyed this card and I welcome your comments. 
Thanks for taking part in our blog hop. Remember that currently you are at my blog - Stephanie Fischer - so click on the next name in the list to ensure that you don't miss out of seeing any of the blogs and the amazing inspiration they contain.

'Til next time.
Stephanie

Product List

Friday, 15 April 2016

Botanical Blooms and banners


It's a Friday, so it must be time for the Crazy Crafters Team Project Highlights!  Do go over and have a look at all the entries - there are a lot talented Crazy Crafters so it's worth the look!  Just click on the image to the left to link to the highlights.
If you visit between 6.30pm on Friday 15 April and 6pm on Friday 21 April, you'll be able to vote for your favourite projects.

SU, Botanical Builder framelits, flowers, layers, banners, hand made card
Botanical Builder thinlits create such a quick and easy wow factor!

Lack of time forced me to keep it simple this week but I'm quite pleased with the result.

I do love the Botanical Builder thinlits - they come to my rescue so much!  Perfect for creating a bit of a wow accent with no stamping involved!  I added a Rhinestone Jewel to the centre of one of the In-Colour Blossom Accents and then placed it into the centre of the large flower.

I used the Banner Triple Punch to trim the ends of the strips - such a quick and easy way to make banners with as many layers as you like!

The card is made with English Garden Designer Series Paper and the cardstock colours are: Soft Suede, Night of Navy and Crumb Cake.

Thanks for visiting - remember to look at the other projects in the highlight.

'Til next time
Stephanie

To make a purchase in my online store, click on one of the product images below.

Product List

Wednesday, 13 April 2016

Wild About Flowers on Watercolour Background

Being very short of time this week [been busy making video tutorials! ;) ] has forced me to think of ways to create a card quickly.

For this one, I combined a simple background with a silhouette and then used layers of cardstock and paper to give it a lift.
SU, Wild About Flowers, Watercolour Wash, watercolour background, hand made card
I think the layers give a bit of grandeur to something very simple

I used the English Garden Designer Series Paper with Pumpkin Pie and Mossy Meadow cardstock for the layers.

For the background: I inked the Watercolour Wash background stamp with Pear Pizzazz and Pumpkin Pie inks and spritzed water onto a piece of Shimmery White cardstock before stamping onto it.  I let the colours run a bit and then dried it with my heat tool.

Once the background was dry I used Archival Black ink and the Wild About Flowers stamp set (another generous gift for advancing to Silver - thank you again, Kylie Bertucci!).  It's a two-step stamp set but oh so quick and simple to do!

I added some Blackberry Bliss ribbon for good measure - this particular version is retired now (I don't use my ribbon fast enough!) but some of the Rich Razzleberry Cotton Ribbon would have done the trick if I'd had some.

Thanks for visiting.

'Til next time
Stephanie

If you'd like to make a purchase in my online store, click on one of the product images below.

Product List

Monday, 11 April 2016

Video tutorial - Blended Bloom - Monochrome Watercolour on coloured cardstock

Phew, what a marathon few days I've had!  I finally got all my ducks in a row for making the much requested video tutorial for monochrome watercolouring on coloured cardstock: equipment, editing software, hours of googling and learning and a certain amount of courage to overcome my feelings of intimidation!

So, whilst I didn't achieve much in my craft room, a video was born!  It's not perfect (I didn't learn about aspect ratios until too late!), I had to do some vicious cutting to squeeze it into 15 minutes and my fear and intimidation can be heard in my voice but, still, I'm quite proud of my achievement and the really steep learning curve that it involved!

I may not have a card to show you today, I'm sorry for that, but I hope this video will prove useful to you.

There are a few things that I didn't say in the video:

  • I like to use ink from the reinker bottle but there are alternatives:
        Squeeze the stamp pad to transfer some ink into the lid and use that ink
        Tap ink from the stamp pad onto a non-porous surface (like an acrylic block) and use that ink
  • It's important to use a Dye ink, like the Stampin' Up inks, for this technique because they are vibrant and transparent.
  • Choose the colour of the cardstock carefully - I find mid-tones work best for me
  • Use a very light touch with the brush to avoid damaging and lifting the paper fibres (or pilling as I call it)
  • Be as sparing as possible with the amount of water used.  Unlike watercolour paper or Shimmery White cardstock, the coloured cardstock is not designed to handle water.
  • As necessary, I remove some pigment from my brush by wiping it on a piece of paper towel.  This helps when I want to blend out colour.
  • This is just the way that I work - I hope my tips may have some merit and be useful but I'm not an expert watercolourist.

There will shortly be a couple of companion videos:

  • Watercolouring a monochrome flower on coloured cardstock using more than one ink
  • Watercolouring a monochrome flower on coloured cardstock using white craft ink

After that, I think I'll delve into some fun folds but if you have any particular requests, email me and I'll do my best to accommodate you.

'Til next time (with a card!)
Stephanie


Sunday, 10 April 2016

Friendly Robot Corner Pop Up card

I enjoyed making the dinosaur pop up card so much that I decided to make another one - this time for my little Great Niece.
SU, Corner pop up card, fun fold, Boys will be boys, Robot card
The robots seem to be heading out of the card to join the party

Perhaps robots may seem like an odd choice for a little girl but I'm hoping she has inherited her mother's love of robots as well as cats - mainly because I didn't have any suitable cat images!

I've tried to make the card a bit interactive: she and her mother can do a lot of counting (robots, hearts, hearts attached to robots), they can look for colours (red, green and yellow and each robot has different coloured eyes) and they can make up a story about where the robots are going.
SU, Corner pop up card, fun fold, Boys will be boys, Robot card
They're very friendly robots who are thinking loving thoughts - maybe not so robotic?!

The card is made from Melon Mambo cardstock and I used the same method that I learned from Dawn Griffith's video tutorial.   I decorated it with Go Wild and It's My Party Designer Series Paper (a gift from my wonderful upline, Kylie Bertucci, when I advanced to Silver - thank you again, Kylie!)
SU, Corner pop up card, fun fold, Boys will be boys, Robot card
The robots are well hidden until the card is quite open

I stamped the robots from the Boys Will Be Boys set in Basic Black ink onto Smoky Slate card, then coloured them with Stampin' Write Markers and gave them a coat of Clear Wink of Stella.

I cut the numbers with the Large Numbers Framelits and punched the hearts with one of the Itty Bitty Accents punches.
SU, Corner pop up card, fun fold, Boys will be boys, Robot card
The front of the card gives no clues about the surprise inside

Thank you for your visit.

'Til next time
Stephanie

To visit my online store, click on one of the product images below.
Product List