Showing posts with label monochromatic watercolouring. Show all posts

Wednesday, 25 May 2016

You've Got This Black Swirly Line - sneak peek

I'm really taken by those swirly lines in the Swirly Scribbles thinlits set.  I knew they'd be going onto my shopping list as soon as I saw them!

Stampin Up,  #thecraftythinker.com.au, You've Got This, Swirly Scribbles thinlits
I love the contrast of the soft flower with the graphic lines

I made a 5.5" square card from the new Flirty Flamingo cardstock and added layers of Basic Black and the new Affectionately Yours DSP.  I then used the 2-way glue pen to glue the black scribbles to the card and finished with my You've Got This panel.

The flower in the You've Got This set continues to be one of my favourites.  It looks so delicate once it's coloured.

For the flower:
I stamped the You've Got This flower with Blushing Bride onto Whisper White cardstock.  I then watercolored it using Blushing Bride, Flirty Flamingo and Watermelon Wonder reinkers.  If you're interested in how I watercolour - you'll find links to my videos here.
I used a Cherry Cobbler Stampin Write marker for the centre of the flower.
I watercoloured the little bit of stem and leaf  with Smoky Slate ink and a dab of Basic Gray.
I cut the flower with one of the retiring Ovals Collection framelits (these are being replaced with the more comprehensive Layering Ovals framelits) and sponged the edge with Basic Gray ink.

'Til next time
Stephanie


Product List - to shop in my online store - click on one of the product images below (Australian Residents only)

Monday, 11 April 2016

Video tutorial - Blended Bloom - Monochrome Watercolour on coloured cardstock

Phew, what a marathon few days I've had!  I finally got all my ducks in a row for making the much requested video tutorial for monochrome watercolouring on coloured cardstock: equipment, editing software, hours of googling and learning and a certain amount of courage to overcome my feelings of intimidation!

So, whilst I didn't achieve much in my craft room, a video was born!  It's not perfect (I didn't learn about aspect ratios until too late!), I had to do some vicious cutting to squeeze it into 15 minutes and my fear and intimidation can be heard in my voice but, still, I'm quite proud of my achievement and the really steep learning curve that it involved!

I may not have a card to show you today, I'm sorry for that, but I hope this video will prove useful to you.

There are a few things that I didn't say in the video:

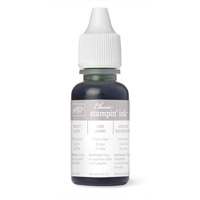
  • I like to use ink from the reinker bottle but there are alternatives:
        Squeeze the stamp pad to transfer some ink into the lid and use that ink
        Tap ink from the stamp pad onto a non-porous surface (like an acrylic block) and use that ink
  • It's important to use a Dye ink, like the Stampin' Up inks, for this technique because they are vibrant and transparent.
  • Choose the colour of the cardstock carefully - I find mid-tones work best for me
  • Use a very light touch with the brush to avoid damaging and lifting the paper fibres (or pilling as I call it)
  • Be as sparing as possible with the amount of water used.  Unlike watercolour paper or Shimmery White cardstock, the coloured cardstock is not designed to handle water.
  • As necessary, I remove some pigment from my brush by wiping it on a piece of paper towel.  This helps when I want to blend out colour.
  • This is just the way that I work - I hope my tips may have some merit and be useful but I'm not an expert watercolourist.

There will shortly be a couple of companion videos:

  • Watercolouring a monochrome flower on coloured cardstock using more than one ink
  • Watercolouring a monochrome flower on coloured cardstock using white craft ink

After that, I think I'll delve into some fun folds but if you have any particular requests, email me and I'll do my best to accommodate you.

'Til next time (with a card!)
Stephanie


Thursday, 7 April 2016

Half Swing Birthday Blooms

SU, Birthday Blooms, Half Swing Card, Pop Out Swing, fun fold, monochrome watercolour, fun fold
Almost managed to capture the beauty of Wink of Stella!

I have a little black book (for crafting!!) that I always have handy.  Whenever I come across a fun fold that I like, a colour combination that I love (sometimes I cut pictures out of magazines or catalogues) or basically anything that inspires me - I write notes in my little black book.

Every time I make a fun fold card or project, I write the instructions (with little diagrams) in my little black book.  If my inspiration has come from another card-maker, I usually make a point of also jotting down their name and/or website.
SU, Birthday Blooms, Half Swing Card, Pop Out Swing, fun fold, monochrome watercolour, fun fold
This is a Half Swing or Pop Out Swing card.

So, I'm rather annoyed with myself that I wrote myself instructions for this half swing card (I've also seen it called a pop out swing card) but didn't include a name or website.  I have spent hours trying to track it down again - to no avail.  All I can do is apologise to the very clever person who created this fold and say "thank you".

SU, Birthday Blooms, Half Swing Card, Pop Out Swing, fun fold, monochrome watercolour, fun fold
Once it's open, it looks quite different from different angles!

I particularly like this version of the fold because it has little tabs that hold the swing mechanism in place, so the recipient doesn't need instructions or have to hold on to anything - all they need to do is to open the card normally.
SU, Birthday Blooms, Half Swing Card, Pop Out Swing, fun fold, monochrome watercolour, fun fold
How old is my Sister-in-Law is going to be?

How I made it:

  • I made the card and mechanism from Bermuda Bay cardstock
  • I added a Basic Gray frame to the front of the card.
  • I stamped the Birthday Blooms image with Pool Party ink onto Pool Party cardstock
  • Then I coloured the image with Pool Party and Bermuda Bay inks (and a touch of Whisper White Craft ink for the stamens)
  • I used the Out of the Box technique to die cut the image and adhered it to the front of the card.
  • The butterflies are punched from embossed vellum and Island Indigo cardstock and have a coat of clear Wink of Stella.
  • The greeting is from the Birthday Blossoms set.  I stamped it onto Pool Party cardstock and added a layer of Basic Gray cardstock.
  • I cut the numbers with the Large Numbers framelits from Dazzling Diamonds glimmer paper.


SU, Birthday Blooms, Half Swing Card, Pop Out Swing, fun fold, monochrome watercolour, fun fold
Guess the secret's out now!

SU, Birthday Blooms, Half Swing Card, Pop Out Swing, fun fold, monochrome watercolour, fun fold
I chose not to decorate the inside a lot so as not to detract from the flower and the butterflies

SU, Birthday Blooms, Half Swing Card, Pop Out Swing, fun fold, monochrome watercolour, fun fold
The Out of the Box die cutting shows to good advantage in this photo
Thank you for visiting.

'Til next time
Stephanie.

To visit my online store, click on one of the product images below.
Product List

Friday, 11 March 2016

Blended Bloom Thank You Card

This is a thank you card for a special lady.  My beautiful, gentle and charming friend, Norma, has accumulated 92 years of wisdom but has not been feeling very well recently and that is making her a bit sad.  I'm hoping this card will help to lift her spirits a little.

SU, Blended Bloom, Watercolouring, monochromatic watercolour, monochrome
I think I should also dedicate this card to the wonderful Stampin' Up! artist who created this beautiful stamp!

Norma and I met several years ago in hospital - we shared a room - and I am so very grateful that we did!

As the pain killers started to wear off and I was waiting for the next dose to work, Norma would tell me a story.  They were always interesting, inpsirational and involved personal or family experiences.  And they always lasted just long enough to distract me until the pain relief took hold.

It took me a while to realise what she had been doing for me despite her own challenges.  That's an example of the wonderful person she is and why I am so grateful to call her my friend.

I'm including this card in the Crazy Crafters Team Highlight this week - which is a bit of a special one!  We are being joined by AMAZING card-makers from around the globe - so do click on this link to go and have a look at all the wonderful projects with a theme of "Thank You".

You can also vote for your favourite projects ... including mine, if you like it!
SU, Blended Bloom, Watercolouring, monochromatic watercolour, monochrome
There is a little touch of Gold Wink of Stella in the centre of this little flower from Everything Eleanor


'Til next time
Stephanie

I have now made some video tutorials:

   This is a fairly detailed tutorial for monochrome watercolouring

  This is a short companion video covering the use of two ink colours

Some extra details:
SU, Blended Bloom, Watercolouring, monochromatic watercolour, monochrome
 I stamped in Rose Red onto Rose Red card.  Then I added some white onto the stamens so that I'd be able to find them later!
SU, Blended Bloom, Watercolouring, monochromatic watercolour, monochrome
 To each petal, I applied a wash of Rose Red ink and then dropped in some Blackberry Bliss to start getting some dark tones.  In places I also blended in a little extra Rose Red.


I was careful to ensure that the ink was dry before working on adjacent areas.
SU, Blended Bloom, Watercolouring, monochromatic watercolour, monochrome


 I just kept building up the tones in the flower in this way.
SU, Blended Bloom, Watercolouring, monochromatic watercolour, monochrome

SU, Blended Bloom, Watercolouring, monochromatic watercolour, monochrome
At the very end, I added a little more dark in places with the fine end of a Blackberry Bliss Stampin' Write Marker.   I also added a tiny touch more white to the stamens.

The very last step was to add the shadow under the flower (so that it wasn't floating in mid air!) and stamp the greeting.


If you would like to make a purchase - just click on one of the product images below.

Product List