This card is a CASE of the gift packaging on page 29 of the Holiday Catalogue.
 |
| This cheeky elf is based on a sample of packaging in the Holiday Catalogue |
The base card is an A5 piece of Emerald Envy cardstock folded in half. To this I've added a layer of Sahara Sand followed by another layer of Emerald Envy which I've clear heat embossed with the Diagonal Stripe background stamp.
The Sahara Sand banner was cut with the largest Banner Framelit and then embossed with the Softy Falling embossing folder.
I used Mint Macaron ink on Whisper White cardstock to stamp the circular greetings from the Merriest Wishes stamp set and then cut it out with the large bauble shape from the matching Merry Tags Framelits.
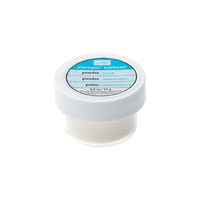
I used the Emeral Envy Glitter Stampin' Emboss powder to heat emboss the "25" stamp onto Mint Macaron cardstock and then cut it out with the circular framelit from the Merry Tags set.
I used gold heat embossing on Emerald Envy cardstock for the other circular pattern from the Merriest Wishes set.
Having arranged the three baubles how I wanted them, I glued them together with Glue Dots. I wrapped some Gold Bakers Twine from the Trio Pack around the loop of the bauble and attached it to the back of the banner with sticky tape. I then used a few Stampin' Dimensionals to attach the baubles to the front of the banner and more Dimensionals to attach the banner to the card front.
I stamped the striped hat from the Jolly Friends stamp set in Emerald Envy onto Whisper White cardstock and punched it out with the matching Jolly Hat Builder Punch. I stamped the other elements that I used from the Jolly Friends stamp set in Basic Black onto Whisper White cardstock. I coloured the collar and hair with Emerald Envy and Early Espresso Stampin' Write markers and watercoloured the face with Pink Pirouette ink. I punched out the remaining hat elements and hand cut around the face and collar. I then glued them all together before attaching them to the bauble.
The last step was to make a double bow from the gold bakers twine and attach it to the top of the bauble.
To save 10%, I purchased the Merriest Wishes Bundle and the Jolly Friends Bundle.
Thank you for visiting.
'Til next time!
Stephanie
Product List - To shop in my online store, click on one of the product images below (Australian Residents only)