Showing posts with label Paisleys & Posies. Show all posts

Wednesday, 23 November 2016

International Project Highlights - Love:


Welcome to our International Visual Blog Hop using current Stampin' Up!® Products. We have all created this gallery of projects for you to be inspired by! We would love it if you could visit every one of our blogs and see a close up of our projects. Our theme this month is LOVE because as card makers we love spreading the love. You can see the gallery below and this will be on every blog that you click on so you will never be lost.

We can never have or give too much love, right?!  I'm so grateful for the love and support of my wonderful husband that I'm sure I'll be giving this card to him in the very near future.
Stampin Up, #InternationalProjectHighlights, #thecraftythinker, Paisleys & Posies, Love, masculine card, Stampin Up Australia Demonstrator, Stephanie Fischer, Sydney NSW
A Paisley expression of love

I used the Paisleys & Posies stamp set to create the background but stamped more of the paisleys and less of the posies for a masculine look.  I stamped with Basic Black ink and coloured with a Real Red Stampin' Write Marker.

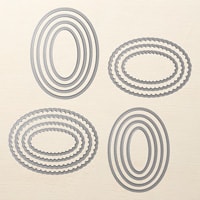
The greeting is from the Painter's Palette stamp set and I cut it out with one of the oval Stitched Shapes framelits which I layered on top of one of the scalloped Layered Ovals framelits.

The Basic Black Stitched Satin Ribbon and Real Red Cotton Ribbon are both from my stash of retired ribbon - for which I apologise but they were the only ones I had that did the job for this card.

Thanks for visiting my blog today, there are so many amazing ideas and inspiration you don't want to miss. We know that you will love our gallery of projects made from Stampin' Up!® Demonstrators around the world! Just click on the thumb nail image to link to the blog post and get a better view and more information.

Thanks for visiting.
'Til next time!
Stephanie
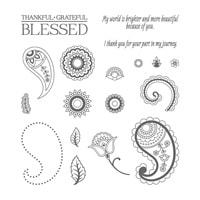


Product List - To visit my online store - click on a product image below (Australian Residents only)


Friday, 28 October 2016

Paisley Square

This card is entered into the Crazy Crafters Project Highlights for this week.  So see all the other great projects and to vote for your favourites, click here (from 7.30pm).

I made some pretty paisley background paper for this card and the leftover piece had been sitting on my desk ever since then.  So, today, I decided to use it up!
Stampin Up, #thecraftythinker, Paisleys & Posies, Card making, Craft, Stampin Up Australia Demonstrator, Stephanie Fischer, Castle Hill NSW
The Paisleys & Posies Bundle is so much fun to use!
The decorative panel is made from layers of Basic Black, Pink Pirouette and Basic Gray cardstock.  I stamped the banner and sentiment from Thoughtful Banners in Basic Black ink onto Pink Pirouette cardstock and cut it out with the matching framelit.  I coloured the ends of the banner with a Smoky Slate Stampin' Write Marker before sticking it to the panel.

I cut layers of paisley with the Paisley Framelits, mixing and matching colours in Smoky Slate, Basic Black, Basic Gray and Pink Pirouette.  I partially inked one of the Pasinleys & Posies stamps with a Basic Black Stampin' Write Marker to stamp the little flower and added dabs of white with a Stampin' Chalk Marker.

The decorative panel is popped up on dimensionals.
Stampin Up, #thecraftythinker, Paisleys & Posies, Card making, Craft, Stampin Up Australia Demonstrator, Stephanie Fischer, Castle Hill NSW
Such a simple way to dress up the inside of a card
I used leftover pieces of my patterned paper to decorate the inside of the card.

Thank you for visiting.
'Til next time!
Stephanie
Product List - To visit my online store, click on one of the product images below (Australian Residents only)

Monday, 17 October 2016

Pretty Pink Paisley

I CASEd this card from this one that I made a few weeks ago that I liked so much I have been unable to part with it! 
Stampin Up, #thecraftythinker, Paisleys & Posies, Mini Tassel, Stampin Up Australia Demonstrator Stephanie Fischer, NSW
The sequins are from the Project Life Good Vibes Accessory Pack

This time I used a silver tassel and some Pink Pirouette.

Stampin Up, #thecraftythinker, Paisleys & Posies, Mini Tassel, Stampin Up Australia Demonstrator Stephanie Fischer, NSW
The inside of the card is also decorated with the Paisley motif

Stampin Up, #thecraftythinker, Paisleys & Posies, Mini Tassel, Stampin Up Australia Demonstrator Stephanie Fischer, NSW
This time I placed another paisley decoration under the flap instead of a greeting

Thank you for visiting.
'Til next time!
Stephanie

Product List - To visit my online store, click on a product image below (Australian Residents only)

Sunday, 9 October 2016

Crazy Crafters Blog Hop - 9 October - Guest Julie Davison

 
Welcome to the Crazy Crafters Blog Hop with our Special Guest stamper, Julie Davison - we are thrilled to have Julie join us this month and so excited to CASE (Copy And Selectively Edit) any project that has been created by her .  We hope you find great inspiration from the projects.

Whether you are starting the blog hop here at my blog, Stephanie Fischer - The Crafty Thinker, or have come from the person before me, be sure to click on the person listed under me further down the page to continue your journey on this blog hop.

Stampin' Up! Fresh Fruit Card for Stamp of the Month Club (August 2016) with Julie Davison www.juliedavison.com/clubs
Click on the image to see Julie's tutorial

This is Julie's beautiful card that inspired me.


One of the many things that I love about Stampin' Up products is the way they work together so effortlessly.  It's so easy to make a special card by combining a stamp set with matching Designer Series Paper.  And what really appeals to me about this card of Julie's is that it makes the most of matching combinations and can be dressed up to suit any occasion just by changing the paper, stamp or embellishments.

I got so caught up in the enjoyment of CASEing this card that I made three cards to suit three very different occasions.

Stampin Up, #thecraftythinker, Bloomin Love, #crazycraftersbloghop, card making, Stampin Up Australia Demonstrator, Castle Hill
I love the classic look of this pretty blue and white combination

Stampin Up, #thecraftythinker, Bloomin Love, #crazycraftersbloghop, card making, Stampin Up Australia Demonstrator, Castle Hill
No wastage!  The spare piece of DSP decorates the inside of the card!
For this very classic looking thank you card, I used the Floral Boutique Designer Series Paper (DSP) and the heart-shaped floral stamp from the beautiful Bloomin' Love stamp set.  The greeting is from Flourishing Phrases.  

The base card is Night of Navy cardstock cut to 12" x 5" and folded in half to form a 6" x 5" card.  For the inside of the card and the top layer of the decorative label, I used Whisper White cardstock to match with the DSP.

The silver ribbon is from the 1cm Glitter Ribbon Combo Pack.

The birthday card combines the very beautiful Petals & Paisleys DSP with the equally gorgeous Paisleys & Posies stamp set.  The greeting is from the Birthday Blossoms stamp set.

To combine the four paisley elements, I used the masking technique.  I stamped the large circle first and covered it with a mask I had pre-made.  I then stamped the large curvy element and masked that before stamping the final two elements.  I stamped them all in Basic Black Archival ink and coloured them with Stampin' Write Markers.  My colour choices were determined by the colours in the DSP.
Stampin Up, #thecraftythinker, Paisleys & Posies, masking, #crazycraftersbloghop, card making, Stampin Up Australia Demonstrator, Castle Hill
I just can't get enough of the this Paisley Suite!
The base card is made from Mint Macaron 12" square cardstock cut to 12" x 5" and folded in half to make a card 6" x 5".  For the inside of the card and for the decorative label, I used Very Vanilla cardstock to match with the DSP.  The ribbon is Delightful Dijon  from the 1cm Ribbon Trio Pack.
Stampin Up, #thecraftythinker, Paisleys & Posies, masking, #crazycraftersbloghop, card making, Stampin Up Australia Demonstrator, Castle Hill
The shapes and colours in this paisley DSP are so beautiful!

For the Christmas card I used the Candy Cane Lane DSP and layered it onto a base card (the same size as the others) of Crumb Cake cardstock.  The ribbon I used is the Real Red 3/4" Stitched Edge Ribbon.
Stampin Up, #thecraftythinker, Cookie Cutter Christmas, masking, #crazycraftersbloghop, card making, Stampin Up Australia Demonstrator, Castle Hill
And now for something seasonal!

I stamped the gingerbread man from the Cookie Cutter Christmas stamp set and punched him out with the matching Cookie Cutter Builder Punch (buy the bundle and save 10%!).  The greeting is also from the Cookie Cutter Christmas stamp set.  

I added a layer of Real Red cardstock for a bit of Christmas oompth and used one the dies from the Christmas Stockings Thinlits set to cut a little bow from Red Glimmer Paper.
Stampin Up, #thecraftythinker, Cookie Cutter Christmas, masking, #crazycraftersbloghop, card making, Stampin Up Australia Demonstrator, Castle Hill
The Candy Cane Lane DSP includes so many iconic Christmas images!

Another great way to dress up this card layout would be to exchange the label shape for a differently shaped layer: maybe a circle, square or Christmas bauble.

I hope you've enjoyed this card and I welcome your comments. 

Thanks for following our blog hop. Remember that currently you are at my blog - Stephanie Fischer - so click on the next name in the list to ensure that you don't miss out of seeing any of the blogs and the amazing inspiration they contain.

Thanks for visiting
'Til next time
Stephanie

Product List - To shop in my online store, click on a product image below (Australian Residents only)