Tuesday, 23 February 2016

Birthday Blooms, watercolour monochrome

The other day I was very happy with the result when I combined the beautiful Birthday Blooms stamp with pastel pencils and decided to try for a similar effect with watercolouring.

Whilst I still prefer my original version, I'm not too unhappy with this for my first attempt and I'll probably try it again having learned from my mistakes!

SU, Birthday Blooms, monocrhome, monochromatic watercolouring, handmade birthday card
Monochrome using Elegant Eggplant Ink and Whisper White Craft Ink

I stamped the flower onto Perfect Plum cardstock with Wisteria wonder ink to provide pale outlines.

I coloured using Elegant Eggplant and Craft White inks, water and a fine paintbrush.

Having experimented a bit, I decided that I found it better to paint with the Elegant Eggplant first and add the white later.  I also found that the white goes a very long way!

While I coloured, I was constantly comparing tones and contrasts - darkening shadows where necessary and adding more highlight from time to time.  I left some parts of the image uninked and used the colour of the cardstock as my third colour - but not as much as I would have preferred.

It was my intention to work evenly across the whole image but that didn't last long!  Had I persevered, I would probably have achieved a better result but my poor little brain wasn't coping - so I found it easier to work on one little area at a time.  I added the shadows and foreground last - although that did present a challenge to get the shadow deep enough!

SU, Birthday Blooms, monocrhome, monochromatic watercolouring, handmade birthday card
I had meant to take photos as I worked but only remembered at this stage!
I stamped the greetings after I'd completed all the watercolouring (and it was dry) to preserve the crispness of the lettering.

I adhered this panel to a layer of Whisper White cardstock and then onto the Elegant Eggplant card.

Thanks for looking.

'Til next time
Stephanie

If you click on the product images below, you will go direct to my online store.

Product List

Monday, 22 February 2016

Fun Fold with Bloomin' Heart - Neutral colours

I enjoyed making the card for yesterday's Blog Hop so much that I made another one - this time using neutral colours.

SU, fun fold, Bloomin Heart thinlit, neutral colours, Go Wild DSP
True to the name of the paper, I really went "wild" with this card!

I used Basic Black to make the card.  The lower front section is decorated with a piece of paper from the Go Wild Designer Series Paper Stack.  The black and white paper at the top is from Everyday Chic and I added a little strip of Tip Top Taupe paper from the In Colour Designer Series Paper Stack.

The flowers are cut from Tip Top Taupe, Basic Black and Whisper White cardstock with dies from the Bloomin' Heart Thinlit Dies.  I've given them centres of sequins from the Metallics Sequin Assortment and Rhinestone Jewels.  

The sentiment is from Cottage Greetings stamped on a Whisper White label cut with a die from the Project Life Cards & Labels Framelits which I edged with Tip Top Taupe ink.

SU, fun fold, Bloomin Heart thinlit, neutral colours, Go Wild DSP
Even with the busy designs, the neutral colours are so elegant

I decorated the Tip Top Taupe 2" circle with a section of Whisper White Bloomin' Heart diecut.

SU, fun fold, Bloomin Heart thinlit, neutral colours, Go Wild DSP
The beautiful greeting is from the One Big Meaning stamp set
For the decorative butterfly, I adhered a Whisper White Bloomin' Heart diecut to the Tip Top Taupe card before cutting with the Bold Butterfly Framelit.

Thank you once again to Patty Bennett for the great tutorial on this fun fold.

'Til next time
Stephanie

Just click on an image to go directly to my online store
Product List

Sunday, 21 February 2016

Crazy Crafters Blog Hop February 2016 - Inspired by Patty

Welcome to the Crazy Crafters Blog Hop for February - we're all finding inspiration in the beautiful creations of Patty Bennett and CASE-ing (Copy And Selectively Edit) one of her projects AND, even more exciting, she's joining us on this blog hop!  Thank you, Patty!

You may just be starting the blog hop here at my blog - Stephanie Fischer, The Crafty Thinker - or you may have come from the person before me in the list. If you get off track at any time, the full lineup below will help you to move along from blog to blog so that you see all of the projects.
Stampin Up cards - fun fold with 2" circle punch.  Botanicals stamp set, paper and framelits cards. by Patty Bennett at pattystamps.com
Patty's beautiful card was my inspiration

I really love this cute card of Patty's! 
SU, Crazy Crafters Blog Hop, Botanical Builder, Botanical Blooms, Fun Fold
My fun fold card inspired by Patty

She has very generously provided tutorials and videos on how to do this fold here.  I did change the dimensions just a little to suit the A4 cardstock.

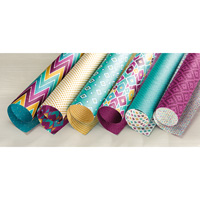
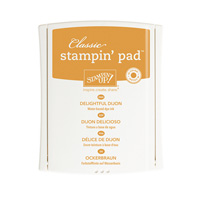
This is my version.  I used Bermuda Bay and Black cardstock to make the fun fold card and decorated it with a selection of papers from the Bohemian Designer Series Paper.  I cut circles from Rich Razzleberry and Blackberry Bliss cardstock and topped them with a Blackberry Bliss, Bermuda Bay and Delightful Dijon flower. The flowers were all cut with the gorgeous Botanical Builder Framelit dies.

I stamped a greeting from the Birthday Blooms stamp set and cut it out with one of the Project Life Cards & Labels Framelits.

I removed a few sequins from the Bermuda Bay Sequin Trim and used them to highlight the large flower and the greeting.

Then I added a few Rhinestone Jewels for a bit of sparkle. 

The inside of the card hides a little surprise.  There's another flower made with the Botanical Builder dies and some matching flowers stamped with the Botanical Blooms Stamp set.  

The greeting is from Happy Birthday, Everyone.

SU, Crazy Crafters Blog Hop, Botanical Builder, Botanical Blooms, Fun Fold
More flowers hidden inside the card!
SU, Crazy Crafters Blog Hop, Botanical Builder, Botanical Blooms, Fun Fold
This is how the card opens


I hope you've enjoyed this card and I welcome your comments. 


Thanks for taking part in our blog hop. Remember that currently you are at my blog - Stephanie Fischer - so click on the next name in the list to ensure that you don't miss out of seeing any of the blogs and the amazing inspiration they contain.


Just click on a product image to go directly to my online store 
Product List

Saturday, 20 February 2016

Birthday Blooms - monochrome - pastel pencil

Long before I started to make cards, I used to paint.  My favourite medium was pastels but I had a go at everything.  Consequently, my craft room is a bit of an Aladdin's cave holding just about everything except ... I was going to say "the kitchen sink" - but it has one of those too!

I was inspired today by a tutorial posted by Melanie Muenchinger, about creating a sketchbook look with stamps, to get out my old pastel crayons and combine them with the Birthday Blooms stamp set. 

SU, Birthday Blooms, monochrome card, grey card, sketchbook look stamping
Birthday Blooms stamp combined with pastel crayons

I stamped with Archival Basic Black ink onto Smoky Slate cardstock and then used the black and the white pastels to colour the flower and create a background and shadow for it.

It was a bit of a messy process because I have always liked to smudge/blend pastels with my fingers!

Once I'd erased all my fingerprints and washed my hands I gave it a spray with fixative before I adhered it to the front of the Basic Gray card.

Soft pencils, charcoal,  watercolour pencils or crayons would also work for this effect.

I'm currently working on a watercolour version, using inks, that I'll show you (if it works!) next week.

I hope you like this one - I really loved making it!

'Til next time
Stephanie


Click on a product image to go directly to my online store.
Product List