Showing posts with label Happy Birthday Everyone. Show all posts

Sunday, 21 February 2016

Crazy Crafters Blog Hop February 2016 - Inspired by Patty

Welcome to the Crazy Crafters Blog Hop for February - we're all finding inspiration in the beautiful creations of Patty Bennett and CASE-ing (Copy And Selectively Edit) one of her projects AND, even more exciting, she's joining us on this blog hop!  Thank you, Patty!

You may just be starting the blog hop here at my blog - Stephanie Fischer, The Crafty Thinker - or you may have come from the person before me in the list. If you get off track at any time, the full lineup below will help you to move along from blog to blog so that you see all of the projects.
Stampin Up cards - fun fold with 2" circle punch.  Botanicals stamp set, paper and framelits cards. by Patty Bennett at pattystamps.com
Patty's beautiful card was my inspiration

I really love this cute card of Patty's! 
SU, Crazy Crafters Blog Hop, Botanical Builder, Botanical Blooms, Fun Fold
My fun fold card inspired by Patty

She has very generously provided tutorials and videos on how to do this fold here.  I did change the dimensions just a little to suit the A4 cardstock.

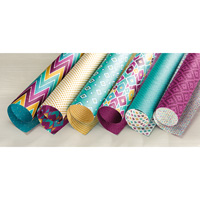
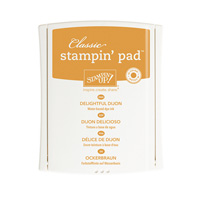
This is my version.  I used Bermuda Bay and Black cardstock to make the fun fold card and decorated it with a selection of papers from the Bohemian Designer Series Paper.  I cut circles from Rich Razzleberry and Blackberry Bliss cardstock and topped them with a Blackberry Bliss, Bermuda Bay and Delightful Dijon flower. The flowers were all cut with the gorgeous Botanical Builder Framelit dies.

I stamped a greeting from the Birthday Blooms stamp set and cut it out with one of the Project Life Cards & Labels Framelits.

I removed a few sequins from the Bermuda Bay Sequin Trim and used them to highlight the large flower and the greeting.

Then I added a few Rhinestone Jewels for a bit of sparkle. 

The inside of the card hides a little surprise.  There's another flower made with the Botanical Builder dies and some matching flowers stamped with the Botanical Blooms Stamp set.  

The greeting is from Happy Birthday, Everyone.

SU, Crazy Crafters Blog Hop, Botanical Builder, Botanical Blooms, Fun Fold
More flowers hidden inside the card!
SU, Crazy Crafters Blog Hop, Botanical Builder, Botanical Blooms, Fun Fold
This is how the card opens


I hope you've enjoyed this card and I welcome your comments. 


Thanks for taking part in our blog hop. Remember that currently you are at my blog - Stephanie Fischer - so click on the next name in the list to ensure that you don't miss out of seeing any of the blogs and the amazing inspiration they contain.


Just click on a product image to go directly to my online store 
Product List

Monday, 1 February 2016

Wetlands on masked, sponged background

In need of a quick but effective birthday card (February seems to be a very busy month for birthdays!), I made this.  What I like about it most is that it's suitable for both genders!
SU, single layer card, masking, sponging, handmade birthday card, masculine card
An easy but effective single layer card - I used Shimmery White card
I simply masked off part of the card (in this case half of it) with some scrap paper and sponged on the colours.  I used shimmery white cardstock because it has a good weight for a single layer card but is also a very nice surface for sponging and watercolouring.

I started with Pear Pizzazz at the bottom then blended in some Sahara Sand followed by Soft Sky.  Then I brought some Marina Mist down from the top and added a tiny bit of Mossy Meadow to the bottom.

Having removed the mask, I then stamped the images from Wetlands with Archival Black ink.  I used a Stamp-a-ma-jig to get the positioning exactly as I wanted it.

The last thing to add was the greeting from Happy Birthday Everyone.

All finished in no time flat!

Thanks for looking.
'Til next time
Stephanie
Built for Free Using: My Stampin Blog

Sunday, 31 January 2016

Grateful Bunch Shaker Card

The Memories in the Making Project Lift Specialty Card Collection (FREE in Sale-A-Bration) is beautiful - it is a combination of resist cards and metallic printed acetate cards.  I decided to use one of the printed acetate 4"x6" cards in a shaker card.
SU, SAB, Shaker Card, Memories in the maker project life specialty cards
A Project Life acetate card form the front of the shaker card
The base card is Lost Lagoon and the stamped layer is Pool Party.  There's a very small edge of Blackberry Bliss framing the gold-printed acetate.

I stamped the flowers with Blackberry bliss onto Perfect Plum cardstock and watercoloured them with Lost Lagoon.  The largest flower has a centre of gold Wink of Stella and the others have a sequin centred with a Rhinestone Jewel.

I stamped the leaves from the Grateful Bunch set with Versamark onto the Pool Party layer to create a very subtle background and the greeting from Happy Birthday Everyone is stamped with Archival Black ink.

The two gold sequins are from the Metallics Sequin Assortment and the others are from the Brights Sequin Assortment.

A few sequins adhered to the top of the card with the Fine Tip Glue Pen "blend" the inside and outside of the shaker.

I've included some dimensions below.
SU, SAB, Shaker Card, Memories in the maker project life specialty cards
So many shiny things!
'Til next time
Stephanie

DIMENSIONS:
Lost Lagoon:                9 1/2" x 6 3/4"
Blackberry Bliss:         6 1/8" x 4 1/8"
Pool Party:                   5 3/4" x 3 3/4"
Printed Acetate card:   Untrimmed 6" x 4"

Thursday, 21 January 2016

By the Tide - an exercise in masking

SU, fish, single layer card, hand made birthday card, www.thecraftythinker.com
A quick and easy card using masking
This single-layer card is all about masking!

I used Shimmery White cardstock because it has a good weight for a single layer card and also has a nice smooth surface that inks up well.

I protected the majority of the front of the card with scrap paper (masked it), leaving one strip ready for sponging with Pool Party, Marina Mist and Night of Navy.

With the masking still in place, I started stamping my fish.  Starting at the right of the card, I stamped a fish then covered with a mask that I'd prepared earlier (see below).  Then I stamped the next fish, moved the mask onto that fish and stamped the next fish and so on.
Tip: Remember that the image you mask will appear to be in front of what you stamp over it.

Once all my fish were stamped, I removed the scrap paper covering the card and stamped the greeting (from the exclusive Hostess set: Happy Birthday Everyone).

Once the ink was nice and dry I added some clear Wink of Stella to the fish to make their scales glisten - sadly it doesn't show in the photo though!

'Til next time
Stephanie

How to prepare a mask:
Stamp the image onto some scrap paper.  I like to use a thin paper (like printer paper).
Cut out the image - making sure to cut inside the lines.
Dab or coat the back of the cut out image with 2-way glue and allow it to dry.

FAQ:
Why do I need to cut inside the lines for a mask?
Well, the edge of the paper makes the stamp "skip" ie it doesn't print in the area immediately around the edge of the paper.  Cutting inside the lines allows for this unprinted zone and prevents a "halo" effect.

Why am using 2-way glue and allowing it to dry?
There are certainly other ways to go about it!  However, this is what I have found works best for me.  The 2-way glue is repositionable once it's dry and is only lightly tacky (if it seems too tacky, I stick it to my clothing a couple of times!) so it stays in place while necessary but is easy to remove without causing any damage to the project.
Built for Free Using: My Stampin Blog

Wednesday, 20 January 2016

Shaker card - Timeless Love

One of the lovely ladies in my classes said she'd like to make a shaker card, so we'll be making one this semester.
SU, www.thecraftythinker.com.au, hand made birthday card, pink & black
An elegant shaker card
I've never considered myself to be a very "pink person" but something about these flowers whispered "pink" to me!

I wanted the shaker to be a bit subtle and elegant, so I decided to use the Metallics Sequin Assortment .... which led me to using some black cardstock to go with the black sequins.

The colours are Pink Pirouette (probably my least used colour!), Basic Black, Whisper White and Pear Pizzazz (for the leaves).

The flowers and leaves on the exterior are watercoloured, except for the centres of the flowers - that's gold Wink of Stella.  The petals have a coat of clear Wink of Stella that you can't see in the photo - you'll just have to trust me when I say they  have a lovely subtle shimmer!

The You're Fabulous greeting (from the A Whole Lot of Lovely set) was inked up with my markers for stamping.  Then I surrounded it with a soft sponging of Pink Pirouette ink.

The fabulous greeting inside the card is from the Happy Birthday Everyone stamp set which, like A Whole Lot of Lovely, is an exclusive Hostess Set.  So, if you like them, book yourself a party or workshop! (It can even be an online / virtual party!).
SU, www.thecraftythinker.com.au, hand made birthday card, pink & black
This is the inside of the card
'Til next time
Stephanie


Built for Free Using: My Stampin Blog

Monday, 3 August 2015

Creative Crew August Challenge - Saying "Goodbye" to Summer - Scrapbook & More

SCRAPBOOK & MORE FOCUS

Well, all good things must come to an end and I'm sad to say that this is my last month on the Creative Crew team.  It's been such an honour to be part of this team and also very enjoyable - I'm going to miss it but wish the new team all the best - I know they'll come up with lots of beautiful inspiration for us all.

CCREW0815SF
Vacation, summer play, family fun times, swimming, canoing, camping, family reunion gatherings (invitations?) and whatever else you can conjure up to signify the celebrations of Summer!  Not a scrapper?  Anything 3-D, mini-albums, giftables, fun fold.  Whatever it is .... no stressing ... just have fun!

Although I'm not a scrapbooker, this challenge had me hunting through old family holiday photos with the thought of creating a scrapbook layout.  And I found this .....

Yes, that's me!  I don't know where I found the dead fish but I clearly wasn't too impressed!

Eventually I gave up on the idea of a scrapbook page but the photos had me thinking about my childhood.  We lived in a "seaside resort" (more correctly - the Thames Estuary!) and were lucky enough to have one of the much sought after beach huts which had a little kitchen so that my grandmother could have her cup of tea at the beach! 

I used to avoid putting my feet down once I'd started swimming because they would sink into soft, silky "mud" and my imagination used to work overtime thinking about what my toes might encounter there!

SU, From Land to Sea, Easel Card, Sprinkles of Life, Happy Birthday Everyone
Beach scene with swimmer
Mixing with the Ozone odour would be the aroma of fish and chips with vinegar and there was the sound of the waves and laughter overlaid with the cries of the sea gulls wheeling overhead - always on the lookout for dropped or abandoned food.

So I recreated my beach scene on a 6" square card front of Crumb Cake.  I made three white rectangles which I dressed with little strips of coloured card to create roof lines and gables - then I trimmed off the excess white along the roof line.  The doors are a simple rectangle of matching card with a Candy Dot handle.  The colours are Pacific Point, Real Red and Night of Navy. The "sea gulls" are stamped in black on Whisper White using the little bird in the Sprinkles of Life stamp set. I drew in legs with a black Stampin' Write marker for the bird standing on the sand.

The dry sand is Naturals Ivory cardstock (which I've since realised is retired) to which I stuck a torn piece of Crumb Cake for the wet sand. 

Then I tore strips of blue card stock: Soft Sky, Marina Mist, Pacific Point and Night of Navy.  The three darker shades I tore into curvy waves and the lightest shade, breaking on the sand, I tore a bit less curvy.  The other part of the torn Soft Sky card I turned upside down to become the sky.  I added white caps (or surf) to my waves with White Craft ink (which took a long time to dry!).
SU, From Land to Sea, Easel Card, Sprinkles of Life, Happy Birthday Everyone
Swimmer - who knows what lies beneath!
SU, Punch Art, Swimming person, Waves
Creating a swimmer in the waves
While the surf was drying, I thought about how to build my swimmer and it turned out to be easier than I expected!  I punched 3/4" circles in Real Red and Blushing Bride and a 1/2" circle in Blushing Bride.  I cut a piece off the red circle to form a swimming cap which I stuck to the pink circle of the same size.  The small piece I had cut off became a bottom!  I cut two pieces from the smaller pink circle to form a hand and foot.  Then I distributed the bits of swimmer between the waves.

I used the jellyfish from the From Land to Sea stamp set to represent my childhood fears of what lay below!  I clear heat embossed it on Whisper White and then sponged with  Pacific Point and Night of Navy.  I stuck this to a piece of Night of Navy cardstock and, with the use of dimensionals, this became the mechanism to hold up the easel card.

I stamped sentiments from Happy Birthday Everyone to complete my day at the seaside birthday card for my very dear friend of more than 50 years!
SU, From Land to Sea, Easel Card, Sprinkles of Life, Happy Birthday Everyone
Greeting & more gulls inside
I hope you like it.  Please join in the Challenge over at Splitcoaststampers!

Stephanie


Built for Free Using: My Stampin Blog