This masculine card is for a friend of ours who loves nature and has a beautiful garden. Unfortunately, I struggled with the photography with the gorgeous copper shine and I have to say that the card is much more handsome in person!
This card is entered into this week's Crazy Crafters Project Highlights which you can visit here to see all the great projects and vote for your favourites.
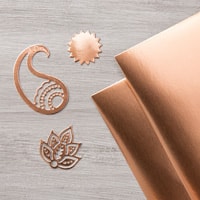
All things copper - foil sheet, embossing powder & metallic thread
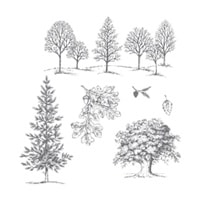
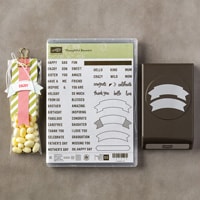
My all-time favourite stamp from Lovely As A Tree is heat embossed with the gorgeous copper embossing powder. I filled the foreground by wrapping Copper Metallic Thread around the card many times. I stamped the leaf image onto Copper Foil Sheet with Stazon ink. The banner is from the Thoughtful Banners stamp set and is stamped in Basic Black ink onto Very Vanilla cardstock (although it has come out looking a bit white in the photo). Thank you for visiting. 'Til next time! Stephanie
Product List - To visit my online store, click on a product image below (Australian Residents only)
For this special birthday card for a very special friend - I broke one of my own rules and used some retired products. The reason? Well - this particular friend is quite passionate about aircraft and still enjoys the memory of his experience in a yellow tiger moth. The best stamp set I know for creating a yellow tiger moth aircraft would have to be the retired (but still wonderful) set called Sky Is The Limit. I also wanted to place his age on the "sun" but have it hidden until the card is opened. Sadly, the current set of dies - Large Numbers - is too big to accomplish that, so I resorted to using a retired set of dies - the Little Numbers Thinlits .... which I really miss because they're a very useful size!
The landscape is courtesy of one of my all time favourite stamps from "Lovely As A Tree"
I stippled the greens into the trees using the little leaf stamp from the Totally Trees stamp set from the new Holiday Catalogue.
The sky is sponged
This fun fold is soooo easy but gives nice depth and "pop" to a card.
The greeting is from "Rose Wonder"
I used a wonderful tutorial by Dawn Griffith to create the Double Z Fold card - I simply moved the 1" strip to the top of the card to carry my aircraft.
Thanks for visiting! 'Til next time Stephanie
Product List - To shop in my online store - click on a product image below (Australian Residents)
We had the pleasure, today, of attending the 70th birthday party of a dear friend and this is the card I made for him. It's a half swing card which I've decorated with Vintage Leaves.
I have also made a video tutorial for this card.
I've taken photos from a variety of angles in attempt to record the three dimensional nature of the card.
The front of the unopened half swing card feating Vintage Leaves
This is the front of the card and how it looks when it's closed.
The card is made from cardstock in one of the new In Colours - Dapper Denim (141434). I'm completely besotted with this colour!
I die cut the centre of card and also made the frame using the new Layering Squares Framelits (141708) that will be released with the new Annual Catalogue on 1 June 2016.
The frame and banner are made from Sahara Sand cardstock and inside the frame is a tag of Tangelo Twist, to which I've adhered the number 70,
The numbers are stamped (using the Number of Years set) in Early Espresso ink onto Sahara Sand cardstock and then I applied a coat of gold Wink of Stella.
I die cut the numbers with the matching Large Numbers Framelits.
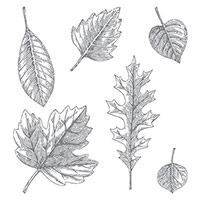
I stamped a variety of the leaves from Vintage Leaves in Basic Black ink to the following cardstock: Sahara Sand, Cajun Craze and Early Espresso.
The card looks so different (and just as great!) from every angle
The leaves are randomly sponged with Dapper Denim, Early Espresso, Pumpkin Pie and Cajun Craze ink.
I glued the leaves in place, being careful not to foul the opening mechanism, before adding the number-bearing tag.
The greeting is a sneak peek of one the greetings included with the new stamp set Mixed Borders (141932) that's in the new Annual Catalogue. I stamped it in Basic Black onto Sahara Sand cardstock and then hand cut it into a banner.
I cut a strip of Whisper White cardstock to fit inside the card
(1 7/8" x 5 1/8") and stamped it with a birthday greeting from the Tin of Cards stamp set.
I've included a diagram, dimensions and instructions below and there is also an accompanying video tutorial.
The little attaching tabs are hidden once the card is finished
With a half swing card, the front panel of the card is still visible when the card is open!
The Vintage Leaves are overlapped and adhered to the centre square panel of the card.
Instructions:
This diagram provides dimensions, scoring and glue positions
Cut Piece 1 to 8.5" x 5.5". Score and fold at 4.25"
Use a die to remove a piece from the centre of the front of the card. Keep the die cut.
Cut Piece 2 to 6.5" x 5.25". Score at 2", 4" and 6"
On side with the 1/4" fold - cut from the edge as far as the score line 1/4" from each side of the card and then cut along the score line between these two cuts to remove the centre centre. This will leave two small flaps.
Fan fold Piece 2 on the score lines and place adhesive on the back of part A.
Adhere part A to the edge of Pieced 1, as shown.
Place adhesive on the flaps and close the card to adhere the flaps to the inside of the front of the card.
With the card closed, place adhesive on the bit of Piece 2 that is showing through the aperture.
Place the die cut back into place to adhere it to Piece 2.
Decorate as desired.
Thank you for your visit. Do have a look at the accompanying video tutorial.
'Til next time
Stephanie
Product List - click on an image below to make a purchase from my online store (Australian residents only)