Showing posts with label Christmas. Show all posts

Sunday, 3 September 2017

Santa's Merry Little Label

A little while ago, I had great fun with the embossing paste which resulted in a few backgrounds sitting waiting on my table to be used!

This is the last from that batch of backgrounds!  I had used Smoky Slate cardstock and coloured the embossing paste with Tranquil Tide ink before using it with one of the Pattern Party masks.
Pattern Party, Embossing Paste, Xmas, Cookie Cutter Christmas, Foil Snowflake, #thecraftythinker, Stampin Up Australia Demonstrator, Stephanie Fischer, Sydney NSW
The metallic Washi Tape and snowflake provide a little seasonal bling

To add a bit of seasonal bling and to give Santa something to stand on, I added a couple of strips of the Year of Cheer Washi Tape to the background piece and adhered one of the Foil Snowflakes (well, to be honest, it's 3/4 of a snowflake - waste not, want not!).  There's also a thin edge of Silver Foil Sheet behind the main panel.  Following my "waste not, want not" approach, I cut out the centre of this piece of foil to save for use elsewhere.

The stacked gifts are from the Ready For Christmas stamp set, and I adhered them with Mini Dimensionals.

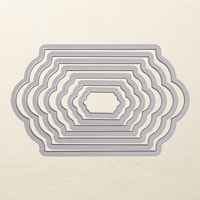
The greeting is from the Merry Little labels stamp set, stamped in Tranquil Tide onto Whisper White cardstock and cut out with one of the Lots of Labels framelits.
Pattern Party, Embossing Paste, Xmas, Cookie Cutter Christmas, Foil Snowflake, #thecraftythinker, Stampin Up Australia Demonstrator, Stephanie Fischer, Sydney NSW
I'm not sure how good a grip Santa has!

I stamped the Santa image from the Cookie Cutter Christmas set and coloured his head and extremities.  Instead of using the matching Cookie Cutter Builder punch, I fussy cut his head, arms and legs and adhered them to the label so that it looked like he was holding up a placard.

Thank you for visiting.
'Til next time!
Stephanie


Product List - Click on a product image to visit my online store (Australian Residents only)

Monday, 14 August 2017

Cheery Swirly Snowflake - Sneak Peek


This elegant Christmas card was soooo quick and easy to make!  Most of the products belong to the new Year of Cheer Suite in the 2017 Holiday Catalogue and will be available from 1 September 2017 to 2 January 2018.
Swirly Snowflakes Thinlits, #thecraftythinker, Year of Cheer Suite, 2017 Holiday Catalogue, Sneak Peek, Xmas card, Stampin' Up Australia Demonstrator, Sydney NSW
It's hard to go past the elegance of the Year of Cheer suite - suitable for many occasions

To the black card base I adhered the snowflake trim.  This is cut from the new Champagne coloured Foil Sheet using the new Swirly Snowflakes thinlits.  

To the other side of the card front, I adhered a piece of the gorgeous new Year of Cheer Specialty Designer Series Paper and added a piece of the Year of Cheer Specialty Washi Tape over the join.

I silver heat embossed the greeting from the Cheers To The Year stamp set onto a small square of Basic Black card and added the little swirls cut with the Swirly Snowflakes thinlits.

To add the final bits of bling, I used Clear and Gold Faceted Gems.

If you're an Australian Resident without a Stampin' Up Demonstrator and would like a copy of the new Holiday Catalogue, contact me with your details.


Thank you for visiting.
'Til next time!
Stephanie

Product List - Click on a product image to visit my online store (Australian Residents only)


Monday, 21 November 2016

Santa's Sleigh Christmas Table Favour box

I finally decided what to make for my Christmas table this year!  So far I've made 10 of the 16 that I need - so I'm feeling quite pleased with myself!  These little boxes will serve as table place names and little treat holders.
Stampin Up, Christmas, Xmas, Table Favour, Treat Box, Santa's Sleigh, Favor, Pretty Pines, Christmas box, Stampin Up Australia Demonstrator, Stephanie Fischer, Castle Hill NSW
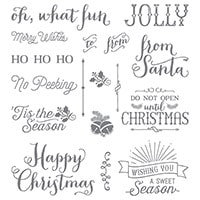
The greeting is from the Oh, What Fun stamp set

The boxes are really easy to make with the Envelope Punch Board and the rest is mostly just die cutting and gluing!
Stampin Up, Christmas, Xmas, Table Favour, Treat Box, Santa's Sleigh, Favor, Pretty Pines, Christmas box, Stampin Up Australia Demonstrator, Stephanie Fischer, Castle Hill NSW
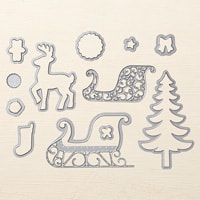
I cut the layers of Santa's Sleigh Thinlits from Silver Foil, Gold Glimmer and Cherry Cobbler cardstocks

I decided on the measurements for my box by measuring the things I plan to put in them.  I took some hints from France Martin and was able to work out my dimensions without much difficulty.  To make a box 1 3/8" deep x 3 1/4" long x 2 5/8" wide, I did the following:

  • Cut a 7" square of cardstock
  • Lined the edge of the cardstock up in the envelope punch board at 2 1/4" 
  • Punched and scored in accordance with punch board instructions
  • Moved the cardstock along to line up at 4 1/4"
  • Punched and scored in accordance with punch board instructions
  • Rotated the cardstock to the next edge.  Lined up the first score line with the Score guide.
  • Punched and scored
  • Moved along to line up the next score line with Score Guide
  • Punched and scored
  • Repeated until all four sides were punched and scored.
  • At one end, I cut along the score lines each side of the tab just as far as the next score line to form reinforcement tabs.
  • At the other end I cut off the little squares altogether.
 
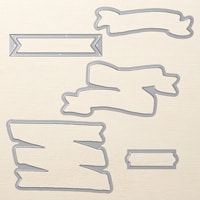
To make the little banners, I used one of the dies from the Bunch of Banners die set and curled the end around a tooth pick before trimming off the sharp ends of the tooth pick.  I didn't want the toothpick to show from the back, so I did add another layer of Cherry Cobbler to the back of the sleigh.

Thanks for visiting.
'Til next time!
Stephanie


Product List - To visit my online store - click on one of the product images below (Australian Residents only)

Monday, 31 October 2016

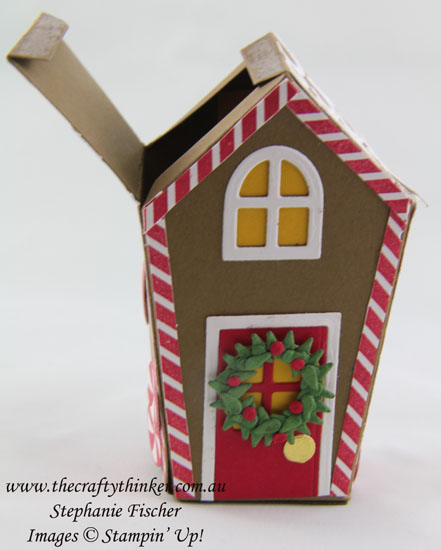
Gingerbread House Treat Box

For quite some time now, this particular bundle of stamps and dies has been looking at me reproachfully, unused, in the corner of my craft room - only because there's so much that I like in the Holiday catalogue and hadn't got to this one yet!  

Still on my search for the perfect addition to my Christmas table, I thought I'd try gingerbread house treat boxes. 
Stampin Up, #thecraftythinker, Christmas Treat Box, Gingerbread House,Xmas Table Favour, Sweet Home Bundle, Stampin Up Australia Demonstrator, Stephanie Fischer, NSW
I put some Crushed Curry cardstock behind the windows to give a cosy look

The box is made from Soft Suede cardstock, which seems to be the right colour for gingerbread.
Stampin Up, #thecraftythinker, Christmas Treat Box, Gingerbread House,Xmas Table Favour, Sweet Home Bundle, Stampin Up Australia Demonstrator, Stephanie Fischer, NSW
The back of the house

I decorated the sides and back of the box with "candy canes" and "pepermint sweets" (or lollies as we call them in Australia!).
Stampin Up, #thecraftythinker, Christmas Treat Box, Gingerbread House,Xmas Table Favour, Sweet Home Bundle, Stampin Up Australia Demonstrator, Stephanie Fischer, NSW
Side view
To make the wreath for the front door, I cut the wreath shape from the Home Sweet Home Thinlits and decorated it with little green leaves  and red berries that I cut with the dies from the Umbrella Weather die set.
Stampin Up, #thecraftythinker, Christmas Treat Box, Gingerbread House,Xmas Table Favour, Sweet Home Bundle, Stampin Up Australia Demonstrator, Stephanie Fischer, NSW
Dies to make leaves and berries
Stampin Up, #thecraftythinker, Christmas Treat Box, Gingerbread House,Xmas Table Favour, Sweet Home Bundle, Stampin Up Australia Demonstrator, Stephanie Fischer, NSW
A close up of the little wreath

I put a layer of a 2-way glue on the flaps of the lid and let it dry so that it formed a temporary adhesive.  This way the box can be opened and closed again.
Stampin Up, #thecraftythinker, Christmas Treat Box, Gingerbread House,Xmas Table Favour, Sweet Home Bundle, Stampin Up Australia Demonstrator, Stephanie Fischer, NSW
Thanks to 2-way glue, the lid can open and close again.
Will the gingerbread house make it to the Christmas table?  That will depend on whether I can summon up sufficient patience to make 15 of those little wreaths!

Thank you for visiting.
'Til next time!
Stephanie

Product List - To visit my online store, click one of the product images below (Australian Residents only)