Sunday, 29 November 2015

Sleigh Ride and Festive Fireplace

I'm so sad that these products are being retired - they've been a wonderful and versatile addition to my stash this Christmas!  Now that I know they won't be around much longer, I'm using them mor than ever!
SU, Xmas Card, Centre Panel Card, Sleigh Ride, window, www.thecraftythinker.com.au
Centre panel card, sponged sky with silver glitter stars from the Confetti Stars Border punch

If you don't have these sets yet, and would like them, it might be a good idea to buy them as soon as you can in case stock runs out.  Just click on the image of the product at the bottom of this post  - it'll link you to my shop.

The greeting is from the To You & Yours Too set which is also retiring.

If you'd like more information about retiring products or if there's anything else you'd like to ask me - please contact me.

'Til next time
Stephanie
Built for Free Using: My Stampin Blog

Saturday, 28 November 2015

Snowmum Shaker Card

SU, Christmas card, Xmas, Shaker Card, Sponging, Masking, www.thecraftythinker.com.au
The glitter in the shaker falls into interesting snow falls
I came over all adventurous yesterday and made my first shaker card!  I've been thinking of improvements ever since but, meanwhile - here it is!

http://www.global-design-project.com/2015/11/global-design-project-gdp012.htmlI have decided to enter it into this week's Global Design Project #GDP012 since Brian King's lovely card inspired me to use the Snow Place stamp set.
SU, Christmas card, Xmas, Shaker Card, Sponging, Masking,www.thecraftythinker.com.au
A little bit of masking and stamping with the Snow Place stamp set

 I've called it my Snowmum card because of the comforting arm/stick around the little snowman.  My niece had been visiting with her new baby and all the cuteness must have affected me!

SU, Christmas card, Xmas, Shaker Card, Sponging, Masking, www.thecraftythinker.com.au
The inside of the card

Built for Free Using: My Stampin Blog

Sunday, 15 November 2015

Crazy Crafters Blog Hop November 2015 - My Most Used Stamp Set


Welcome to the Crazy Crafters Blog Hop for November. This month we are showcasing our most used stamp set! We hope you like our choices and find great inspiration from the projects.

You may just be starting the blog hop here at my blog - Stephanie Fischer, The Crafty Thinker - or you may have come from the person before me in the list. If you get off track at any time, the full lineup below will help you to move along from blog to blog so that you see all of the projects.

My most used stamp set would have to be Lovely As A Tree!  It was my first stamp set purchase and remains one of my all-time favourites!  It really gets a work-out because it's just so versatile - it's equally suitable for Christmas cards, birthday cards (masculine or feminine), sympathy cards ... pretty much everything really and it also lends itself very well to many different techniques and so it can look very different, depending on the techniques and/or colours you use.
SU, Heat Embossing, Christmas Card, hand made
Lovely as a tree painted with embossing powders. Greeting from Six Sayings

I created these cards by "painting" with embossing powders - and a lot of fun it was too!  First I stamped the image with Versamark and then I very carefully sprinkled small amounts of three different embossing powders roughly where I thought I'd like them.  I tipped the card down to remove the excess powder and so the tops of the trees remained very white and little bit of "snow" fell onto the ground too. Then I tapped off any excess and used the heat tool. 

For a great tutorial on the technique see Sandi McIver's PDF here.

In this one, I used black, gold and white on Sahara Sand cardstock which I layered with Elegant Eggplant and Gold Foil cardstock.


I wanted the tree trunks and bases of the trees to be darker and the tops of the trees to be lighter and so I concentrated my embossing powders accordingly.

SU, Heat Embossing, Christmas Card, hand made
For this card, I used black, silver and white embossing powders on smoky slate cardstock (layered with black, Basic Grey and Silver Foil cardstock). 
  
SU, Heat Embossing, Christmas Card, hand made
Another version in gold
 

SU, Heat Embossing, Christmas Card, hand made


One of the joys (and sometimes frustrations!) of this technique is that it looks different every time!  Here are a couple of other cards to show you what I mean.

I hope you've enjoyed these cards and I welcome your comments. 

Thanks for taking part in our blog hop. Remember that currently you are at my blog - Stephanie Fischer - so check the blog hop line up list to see who is next in the list and click on their name as you don't want to miss out on seeing any of the blogs and the amazing inspiration they contain.


Built for Free Using: My Stampin Blog

Thursday, 12 November 2015

Christmas card - To You & Yours Too

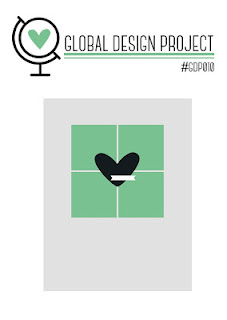
Time is not my friend at the moment so I was very excited to complete a card to enter into the latest Global Design Project challenge!  This is GDP010 - click the image for the link to join in or see all the lovely entries.
http://www.global-design-project.com/2015/11/global-design-project-gdp010.html?showComment=1447187062043
And this is my card using the To You &Yours Too stamp set, some masking and sponging.
SU, Global Design Project, Heat & Stick, Delicate Ornament Thinlits, sponging
My entry for #GDP010: To You & Yours Too, Delicate Ornaments Thinlits, Masking & Sponging
To go with the moonlight theme, I stamped the black cardstock with versamark using the little stars from the stamp set and heat embossed with Heat & Stick before sprinkling with Dazzling Diamonds glitter.

I masked the moon with a circle of scrap paper (I made it sticky but removable with some 2-Way glue) before sponging with Soft Sky, Pool Party, Pacific Point, Night of Navy and a tiny touch of black.  Then I removed the mask and stamped the main image from the stamp set with Archival black ink.  I then cut out the image with one of the Delicate Ornament Thinlits and sponged the edge with a little black.

The ornament top and hook are cut from Silver Foil with dies from the same set.

I stamped the banner from the Project Life Hello December 2015 stamp set and coloured between the lines with my Pool Party Stampin' write marker (although it's a bit hard to see in the photo).  I manipulated the photopolymer greeting from the Happy Scenes stamp set so that it followed the shape of the banner and stamped with Pacific Point ink.  Then I fussy cut the banner.

The squares are Pacific Point cardstock layered onto Pool Party. The main card is also Pool Party.

I had so much fun with this that I went on to make several more cards using the same stamp set and similar technique: some sunsets and some moonlight.  I added the sled & reindeer image from Cozy Christmas and to some of them I added the trees from the Wonderland stamp set.

SU, masking & sponging, sunset background
Crushed Curry, Tangelo Twist, Cajun Craze, Bermuda Bay, Night of Navy, Black
SU, masking & sponging, Moonlight background, moonlit,
Soft Sky, Pool Party, Night of Navy, Black.  Main image in Basic Grey

Built for Free Using: My Stampin Blog

Sunday, 1 November 2015

Christmas cards with heat embossing & bleaching

I thought I'd quickly share what we'll be doing in the next Tuesday class.  We'll be heat embossing and discussing different effects that can be achieved using heat embossing. 

Then we'll be painting our embossed images with bleach.  We'll then use inks to colour some of the images.

This is the first card that we'll be making together:
SU, Delicate Ornaments Thinlits Dies, Curvy Corner Trio Punch, Emboss Resist
Cozy Christmas - heat embossed then bleached
We'll create the top layer (that hopefully brings snowflakes to mind) with the Emboss Resist technique - clear embossing on Whisper White and sponging with Smoky Slate.

We'll die cut the ornament shape from the centre of the card (keeping the ornament die cut for another project!).

The image from Cosy Christmas is heat embossed with black onto Marina Mist cardstock. 

Using a small soft brush, household bleach is applied to the trees, roof, windows and chimney smoke.  Here I used 4 applications of bleach, drying with a heat tool between applications to check on the level of bleaching achieved.  I heated from the back of the paper to preserve the embossing.

I also applied bleach to the foreground to look like snow.  I painted it onto the card in a streaky sort of way to create interest and look more "scenic" and I also applied less bleach closer to the cottage to create some depth.

The corners of the card and the spotty layer were punched using the Curvy Corner Trio Punch.

I centred the ornament cut out over my scene, trimmed off any stray edges and then layered it onto the Basic Grey card.  

I finished it off with a few Rhinestone Jewels and a little bit of white ribbon from my stash.

I have entered this into the November link up at Just Keep On Creating - anything goes and it's a fun way to share creativity.  Click on the image to have a look.
http://justkeeponcreating.blogspot.com.au/

SU, Delicate Ornaments Thinlits Dies, Curvy Corner Trio Punch
Cozy Christmas again but without the emboss resist layer


I also made a slightly simpler version without the emboss resist technique - just in case time is tight!  You can see that I used more bleach in this one.
SU, Delicate Ornaments Thinlits Dies, Curvy Corner Trio Punch,
Santa's Gifts, bleached then coloured
SU, Delicate Ornaments Thinlits Dies, Curvy Corner Trio Punch,
Close up of the tree
If time allows we'll also make something like this card which will allow us to colour in our image after we've bleached it. 

The tree image is from the Santa's Gifts set and I coloured it using Stampin' Write Markers in Pear Pizzazz, Garden Green, Daffodil Delight, Real Red, Chocolate Chip, Hello Honey and Cherry Cobbler. 

To create the stars, I punch a little bit of left over Dazzling Diamonds Glimmer Card with the Confetti Stars Border Punch and glued on some of the resulting little stars with the Fine-Tip Glue Pen.

The emboss resist background is a bit bright but I wanted to offset the rather muted tones in the ornament (I used the same piece of Marina Mist cardstock  for both cards to save time!).  The colours in the background are Daffodil Delight and Watermelon Wonder.  The bow is Calypso Coral Seam Binding Ribbon and the ornament is "hanging" from a little piece of silver Cording Trim.

I also made this, slightly more advanced, card using heat embossing and bleach.  The images are from Happy Scenes, Wonderland and White Christmas.  The snow is stamped with bleach using  one of the little stamps from Sheltering Tree.  To create the trees in the background, I used the same stamp twice but the second time, I masked out one of the trees.
SU, Wonderland, Happy Scenes
Scene creating using heat embossing & bleach: Wonderland, Happy Scenes, White Christmas
I'll be back soon to show you some cards I've made by "painting" with embossing powder.

Thanks for visiting.
Stephanie


Built for Free Using: My Stampin Blog

Friday, 30 October 2015

Birthday Blossoms #GDP008

Birthday Blossoms

This week I have entered into the Global Design Group Challenge -GDP008 which calls for us to CASE a beautiful card designed by Kylie Bertucci.

Click on the picture to see all the beautiful entries to this challenge or enter yourself
I also entered the card into the Just Keep On Creating link up for November - anything goes
http://justkeeponcreating.blogspot.com.au/
Click on the image to see all the other entries or enter yourself

 This is the card that I have made using the Birthday Blossoms stamp set.  The colours are So Saffron and Chocolate Chip with Whisper White

SU, Birthday Blossoms, Global Design Project 008, Triple Banner Punch
Birthday Blossoms for my entry to GDP008
 I stamped the background layer with the small flowers using So Saffron ink, stamped off first.  The flowers are stamped with Chocolate Chip onto So Saffron and watercoloured a little with Chocolate Chip.  The large flowers are punched out with the matching Pansy Punch.  The circular label is stamped with Chocolate Chip and sponged with So Saffron and Chocolate Chip.

I enjoyed making it so much that I decided to make some similar ones!

Until next time.
SU, Birthday Blossoms, Global Design Project 008, Triple Banner Punch
Masculine version using Guy Greetings Stamp Set
SU, Birthday Blossoms, Global Design Project 008, Triple Banner Punch
This one is Basic Grey & Soft Sky


SU, Birthday Blossoms, Global Design Project 008, Triple Banner Punch
Elegant Eggplant and Pink Pirouette

Built for Free Using: My Stampin Blog

Sunday, 18 October 2015

Crazy Crafters Blog Hop October 2015 - Fun Fold


Welcome to the Crazy Crafters Blog Hop for October. This month we are excited to show off some amazing fun folds. We hope you find great inspiration from the projects.

You may just be starting the blog hop here at my blog - Stephanie Fischer, The Crafty Thinker - or you may have come from the person before me in the list. If you get off track at any time, the full lineup below will help you to move along from blog to blog so that you see all of the projects. At the moment you are visiting Stephanie Fischer, The Crafty Thinker.

I'm a bit in love with easel cards at the moment!  They're so easy but effective and they make a nice display for the lucky recipient of the card.  There are many good tutorials available for easel cards and I don't really know to whom I should give credit for this great fun fold but, whoever you are, thank you!

The colours in this easel card are Smoky Slate, Elegant Eggplant and Wisteria Wonder.   
 
SU, Easel Card, Tags & Labels framelits, snowflakes, Pillow Top Card
Flurry of Wishes Easel Card
 For the snowflakes I used the Flurry of Wishes stamp set (from the Holiday Catalogue), stamping with Versamark onto Silver Foil and heat embossing with Silver Embossing Powder before punching out with the matching Snow Flurry Punch.  I then used Dimensionals to adhere them to the card and placed a Rhinestone Jewel in the centre of each one.
SU, Easel Card, Tags & Labels framelits, snowflakes, Pillow Top Card
Closed position

The greeting is from the Lots of Joy stamp set (in the Annual Catalogue), which I stamped onto Smoky Slate card and cut out with the Tags & Labels Framelits.  I added a layer of Elegant Eggplant cut with a larger Tags & Labels framelit and placed it onto the card front with dimensionals.

To create the Elegant Eggplant label that supports the easel, I cut a rectangle and then made decorative ends using the Tags & Labels framelits and the method I described in this blog post.   
SU, making a symmetrical label with Tags & Labels framelits
Symmetrical label from Tags & Labels framelits
I'd like to thank Sheri Pearson at Inkspirations for the inspiration and technique tutorial for the pillow top panel.  Click here to see her tutorial.   

SU, Easel Card, Tags & Labels framelits, snowflakes, Pillow Top Card
Pillow top background inspired by Sheri at Inkspirations
Following Sheri's tutorial, I scored the pattern onto the Wisteria Wonder cardstock.  Then I folded each score line and inked both sides of the fold with Wisteria Wonder ink.

I layered this decorative panel on to Elegant Eggplant before adding it to my Smoky Slate Easel front.  Once all my elements were in place, I added a dab of Dazzling Details to each intersection of the lines.  I was rushing a bit and didn't do a very neat job but it doesn't seem to matter as much as I feared it would.  I'll do better next time!

I hope you've enjoyed this card and welcome your comments.

Thanks for taking part in our blog hop. Remember that currently you are at my blog - Stephanie Fischer - so check the blog hop line up list to see who is next in the list and click on their name as you don't want to miss out on seeing any of the blogs and the amazing inspiration they contain.


Built for Free Using: My Stampin Blog