![]() |
| A Diamond Fold card decorated with the Storybook Gnomes paper |
![]() |
| Another Christmas card made with the Storybook Gnomes paper and coordinating Gnomes dies |
![]() |
| A Diamond Fold card decorated with the Storybook Gnomes paper |
![]() |
| Another Christmas card made with the Storybook Gnomes paper and coordinating Gnomes dies |
![]() |
| A Christmas Waterfall card featuring Kindest Gnomes |
I made this card as a sample for a class teaching Waterfall cards - and because it's that time of year when I start the Christmas card making process.
I changed the dimensions for the waterfall to accommodate these gorgeous gnomes - the ones that I promised myself I wasn't going to buy ....!
![]() |
| Each of the "flip" sections features a different gnome |
![]() |
| There are four gnome images in the stamp set along with a "dwelling" |
![]() |
| The stamp set is very versatile with greetings covering a variety of occasions, not just Christmas |
![]() |
| I used a label die to trim and shape just the end of the waterfall mechanism |
![]() |
| These are the dimensions I used for my waterfall mechanism |
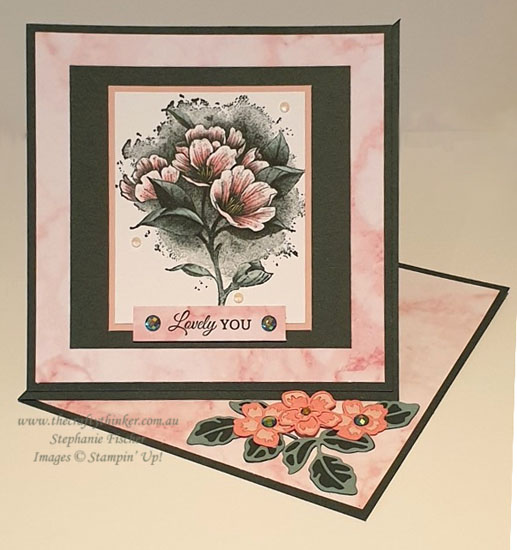
| Twisted Easel fun fold card featuring Calming Camellia stamp and Summer Shadows dies |
Calming Camellia has now officially been added to my list of all-time favourite stamp sets! This distinktive stamp is perfect just as is and also looks beautiful with the addition of a little simple colouring. It's also perfect for multiple occasions or purposes.
For this card, I stamped with Evening Evergreen ink onto Whisper White card and then enhanced it a little with some Stampin' Blend alcohol markers.
The Twisted Easel is such a simple, versatile and effective fun fold! I cut the base and several layers from Evening Evergreen cardstock, adding layers of Blushing Bride and Simply Marbleous Designer Series Paper (that I got free in Sale-A-Bration).
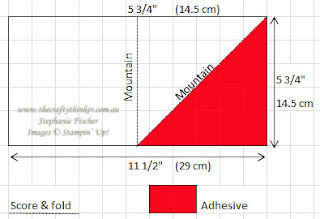
The base card measures 5 3/4" square (cut the cardstock to 5 3/4" x 11 1/2" and score the long side at 5 3/4". Score a diagonal from the top right corner to bottom left corner of the card front) and I cut the layer that adheres to the lower section of the base card a little smaller at 5 1/2" square so did not apply adhesive all the way to the edge of the base card.
| Diagram for Twisted Easel base card |
The flowers and foliage that decorate the corner of the inside of the card were created with the Summer Shadows dies. The centre flower is popped up on a Dimensional to form a prop to hold open the easel.
Thank you for visiting.
Until next time!
Stephanie
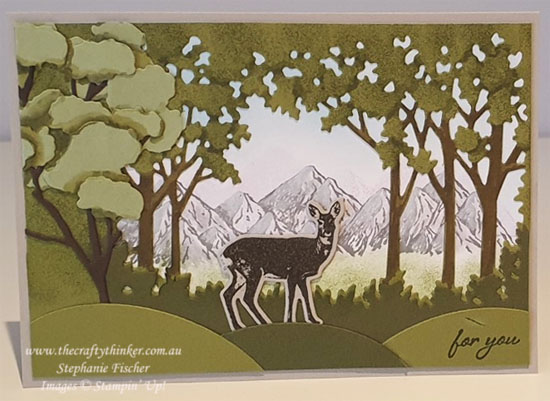
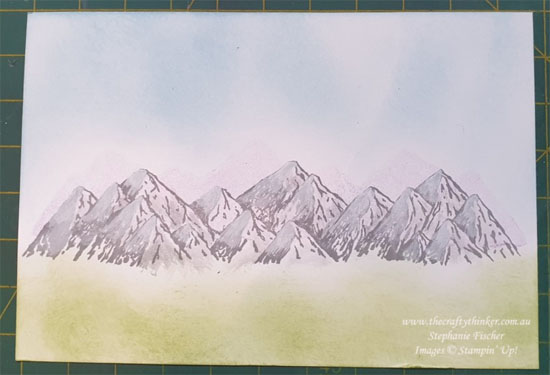
| Grassy Gove Bundle paired with Mountain Air stamp set & Harvest Dies |
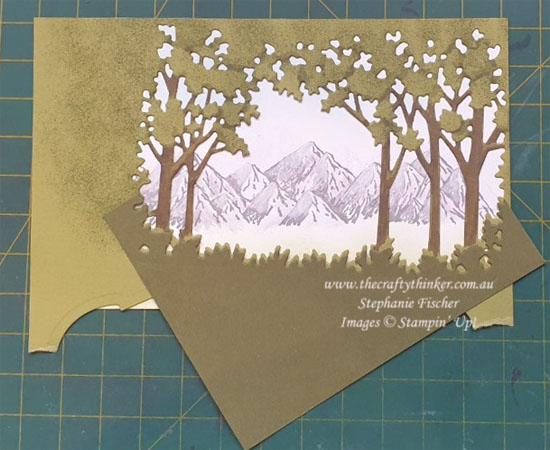
This card was inspired by my friend RaeDeen and I really wish I'd done a better job!!
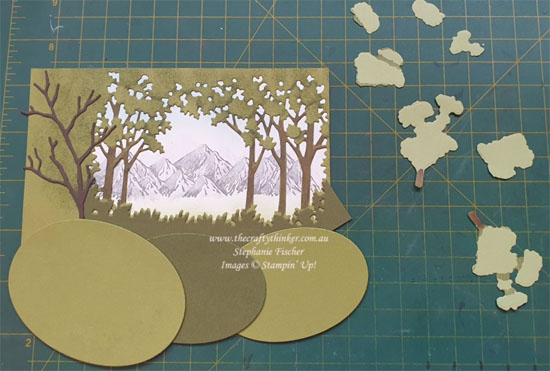
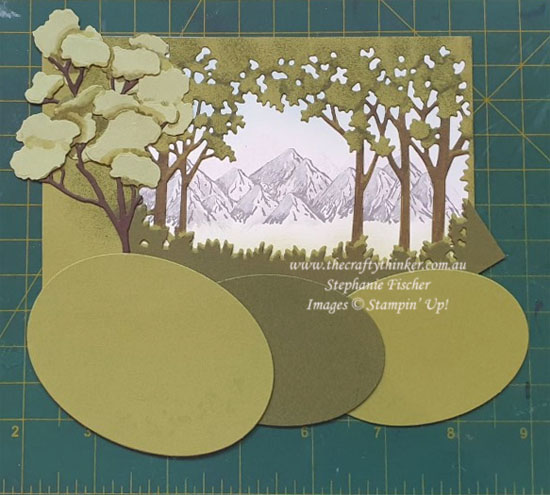
My dislike of wastage is well-documented but the embarrassing step by step photos below (which I share as a cautionary tale!) are testament to the fact that a certain amount of planning is beneficial. My lack of planning, and poor choice of left over bits of card to use, created unnecessary challenges that kept me problem-solving each step of the way!
'Til next time
Stephanie
I hereby invite you to have some fun at my expense!
| It started out OK with some sponging, white craft ink and the Mountain Air stamp |
| Having spent a few minutes kicking myself, I decided to rescue the piece rather than waste the card so I proceeded to stipple the tree canopy with ink and colour the trunks with Stampin' Blends |
| For my next blooper! Clearly this was not the best piece of card to have used! A few more bruises added to my shins, another decision to not waste the card and another rescue mission required! |
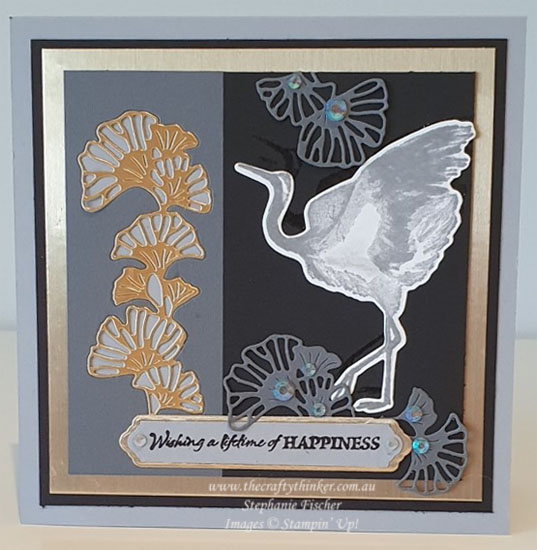
| Crane of Fortune Bundle |
I had experimented with clear embossing the crane onto black cardstock and decided that it didn't really work (I'm going to try it on Basic Gray though!). As you might know, I hate to waste anything, so that unfortunate crane now forms a shadow behind the star of the card.
If you're wondering about that label: I used a die from the now retired (sorry!) Vine Design Bundle and trimmed it to the size I wanted.
'Til next time
Stephanie
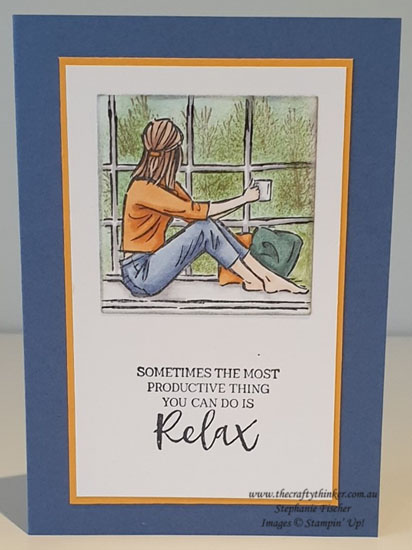
| In the moment stamp set |
Oh dear, it's been a while, hasn't it!
I'm not going to make excuses - I've just been taking care of myself by removing the pressure to create, photograph and blog. I've just returned to my craft room and am having fun with some new bits and pieces.
This is one of the images from the In The Moment stamp set.
I stamped the image, masked it (yes, it was a little bit fiddly to cut out the window panes but not as bad as I had expected) and then stamped the trees from the Winter Woods stamp set. I sponged the trees and sky before I removed the mask.
Then I coloured the image with Stampin' Blends alcohol markers.
NOTE:
When I was making the mask - I extended the window panes. Once I removed the mask, I simply extended the lines with a fine black pen.
I cut the little scene out with one of the Layering Square dies and sponged around the edges with some Smoky Slate ink.
Bye for now - I'll pop in from time to time when I feel up to tackling technology and feel I have something worthwhile to share.
See you then!
Stephanie
The Crafty Thinker
Why are flowers always considered to be feminine? I made this Valentine card for my husband - he likes flowers too!
| True Love Valentine Card for my true love |
For this card, I coloured one of the posies with my Stampin' Blends alcohol makers and fussy cut it.
The layer beneath the flowers is a leftover piece from this card, made with a mask, glue and Gilded Leafing. I used it because it was on the desk but could just as easily have used another pattern from the paper pack (and it would probably have looked better!).
The other decorative layers are more pieces from the True Love paper pack, combined with Real Red and Basic Black cardstock.
The greeting, from Forever Blossoms, was stamped with Real Red ink and cut out with one of the Tasteful Labels dies.
Thank you for visiting
'Til next time!
Stephanie
Product List - All available for purchase from my online store