I'm currently having a great weekend in the Gold Coast - the highlight being On Stage on Saturday. I'll share more information on that later in the week and I'll share sneak peeks from the upcoming Occasions Catalogue as soon as possible!
 |
| My swaps for On Stage - I made several in each colour |
These are samples of the swaps I took with me to On Stage. The You've Got This flowers are coloured with the new Stampin' Blends alcohol markers and cut out using the out of the box technique (keep scrolling down for a tutorial on that technique).
 |
| Cherry Cobbler and You've Got This |
I used four alcohol markers for each flower. For the Cherry Cobbler version I used the Cherry Cobbler Stampin' blends as well as the Calypso Coral.
 |
| Daffodil Delight You've Got This |
For the Daffodil Delight version, I used the Pumpkin Pie markers as well as the Daffodil Delight pair.
 |
| Rich Razzleberry You've Got This |
For the Rich Razzleberry sample, I used team those two markers with the two Pink Pirouette markers.
Thank you for visiting.
'Til next time!
Stephanie
Product List
Out of The Box Technique Tutorial
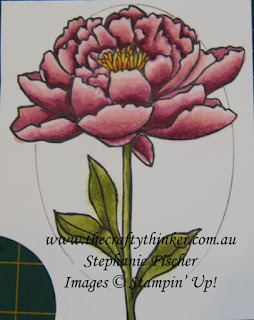 |
| Out of the Box Technique - Step 1 |
Position your chosen die on your project and use a pencil to lightly draw around the
inside of the die
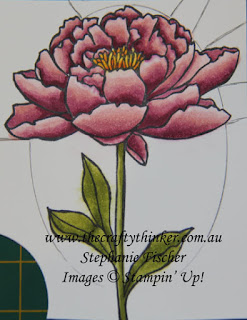 |
| Out of the Box Technique - Step 2 |
Determine which parts will be outside of the die cut and, using your snips, cut straight up to those parts of the image - try to cut at a 90 degree angle to the image.
Note: I had quite a few separate pieces sticking out of the die cut so there are quite a few cuts!
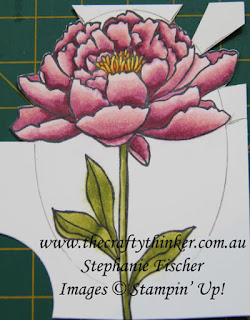 |
| Out of the Box Technique - Step 3 |
Carefully fussy cut around the parts of the image that stick out from the pencil line (which is where the die will cut)
 |
| Out of the Box Technique - Step 4 |
Making sure that the cutting edge is facing down towards your project, slip the die underneath the parts of the image that will be outside of the die cut.
Tip: You may need to turn the die to make this step easier and then straighten it once you've successfully slipped it under the necessary parts of the image.
Run the piece through your Big Shot (or similar die cutting machine) in the usual way.
 |
| Out of the Box Technique - Step 5 - the finished piece |


superbe!
ReplyDeleteMerci bien!
Delete