MERRY CHRISTMAS TO YOU ALL!!!
... DESPITE THE LOCKDOWNS AND CHALLENGES.
Now for some cards - better late than never? Perhaps some inspiration for next Christmas?!
 |
| The bauble and greeting were stamped with glue before receiving a coat of Gilded Leafing |
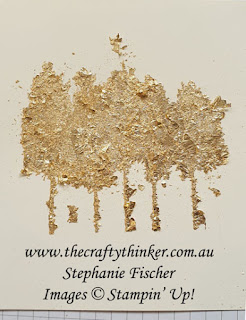
These cards (including the greetings) feature the Gilded Leafing which is new to Stampin' Up in the Mini Catalogue which will run from 4 January 2021 to June.
 |
| A variant of the the Christmas Gleaming teamed with Gilded Leafing |
Although this product is new to Stampin' Up, I've been using similar metallic leaf flakes for several years and love the results and the fun of creating with them (although it can be a bit messy!). So when I saw the flakes in the new catalogue, it was the first thing to hit my wish list.
 |
| This little gilded fellow was "coloured' with white craft ink and a Water Painter |
 |
| I fussy cut (quite roughly) the foliage once I'd applied the Gilded Leafing |
Once I have them out and I'm making a bit of a happy mess, I tend to set up lots of images for later use - I sort of maximise my glue / gold leaf mess to creation ratio!
Stampin' Up recommend using the Gilded Leafing flakes in conjunction with the Heat & Stick powder (it's much like using embossing powder but results in a slightly sticky image.)
However, for some reason, I've never got on well with Heat & Stick - perhaps my methodology is incorrrect - so I tend to use the Multipurpose Liquid Glue.
So this is what works for me:
- Spread some glue onto a suitable surface. You don't need as much as you think - a little goes a long way.
- Suitable surfaces would include something that's smooth but with a little bit of give - a bit like a stamp pad. My favourite is this little rectangle of foam that has a rubber backing, it's called Phat Foam.
 |
| I spread my glue on my old and favourite bit of Phat Foam. This is enough glue to stamp several images |
I also use this craft foam that has a cotton cover. I remember that I bought a large piece at a craft store and cut it into smaller pieces.
 |
| An alternative "pad" for the glue - stamp pad foam |
- Tap the stamp into the glue (alternatively use a piece of sponge to evenly tap some of the glue onto the stamp) - remember you don't need a lot, then stamp the image onto your cardstock.
- Leave the glue to dry a little, so that it's just tacky (it won't take long).
- Press Gilded Leafing flakes all over the image.
 |
| Press the flakes of gold leaf down onto the sticky image |
- Then gradually, and gently, start to burnish off the excess gold with a finger tip.
 |
| GENTLY start buffing off the excess Gilded Leafing with a finger tip |
- Then finish the burnishing/cleaning process by VERY GENTLY (as in hardly touching the surface) buffing with a soft brush, a soft sponge (see below - this is Scoochi Foam) or - if all else fails - your finger. Let me stress again ... GENTLY ... so that you don't rub off all of that beautiful gold leaf!
 |
| Finish the burnishing process with a soft sponge or a finger tip ... VERY GENTLY! |
TIPS:
- I like to keep a little container of warm water nearby and drop the stamps into it as soon as I finish stamping with them. This make the glue residue removal easy.
- I keep an old toothbrush in my craft room and employ this to remove the glue residue from the stamps.
- As soon as I've finished with my "glue mat", I rinse it thoroughly under running warm water and then give it a bit of a soapy wash and a final rinse. Let it dry thoroughly before using it again.
- The gold flakes are incredibly light and float all over the place at the slightest opportunity. So, instead of trying to get the unused flakes back into their original pot, I keep a little box handy and pop them in there. Cardboard is better than plastic or acrylic because of the effect of static on the flakes!
Have fun with these gorgeous flakes - try gilding 3D articles or gilding a straight line by applying some Tear & Tape and then the gilding flakes.
Thank you for visiting.
'Til next time!
Stephanie
Product List - Available for purchase from my online store


No comments:
Post a Comment