Monday, 6 June 2016

First Sight of Copper Botanicals

Inspiration can be such a strange thing - when and how it strikes and what prompts it.

At Christmas I was fortunate enough to win a raffle - the prize being a hot stone massage - how lucky was I!  It's taken me half a year - but I finally managed to squeek it in just before the gift token expired!

I sat in the very elegant waiting room, enjoying the tranquility, aromas and style and then my gaze fell on a beautiful, sleek copper water pitcher sitting on a timber table in front of the Aubergine coloured wall and inspiration started to tickle my brain.  Then I noticed the elegant taupe curtains and the aubergine and taupe chairs and the copper colour  repeated in the paintings on the wall.

At that point I'm afraid I broke the serenity by feverishly rummaging through my bag looking for my note pad and pen to write down: Elegant Eggplant, Tip Top Taupe, Copper.
Stampin Up Australia, #thecraftythinker, First Sight, Botanical Builder, Copper, Independent Stampin Up Distributor
Inspired by the decor at a local beauty spa!

So I've added a layer of Chocolate Chip behind the Elegant Eggplant and the base card is Early Espresso.

I stamped the flourish from First Sight onto the Elegant Eggplant layer with Versamark and heat embossed it with copper embossing powder.  I left the lower right quandrant free to try to give more impact to the flowers.

The greeting from First Sight is stamped in Basic Black onto Perfect Plum and cut with a die from the Project Life Cards & Labels framelits - I just resized it and then did the same thing with a piece of Early Espresso to put underneath.  I popped this little "banner" up on dimensionals and offset it a little on the card for a bit more interest.

To make the copper flowers, I grabbed a piece of retired cardstock (colour unimportant) and gave it a good coat of versamark.  I then gave it a good sprinkle of copper embossing powder and used the heat tool.  After giving it a minute to cool, I ran it through the Big Shot with the Botanical Builder framelits.  I then shaped the flowers with a bone folder and ball tool on a piece of foam.  I cut centres from Elegant Eggplant and a little black to contrast with the copper.

I added plain Rhinestone jewels to the larger flowers and for the smaller flowers, I coloured the rhinestones with a black sharpie before I put them into the centre of the flowers.

Thank you for visiting.
'Til next time.

Stephanie

Product List - to shop in my online store, click on one of the product images below (Australian Residents only)

Sunday, 5 June 2016

Botanical Blooms Mambo - GDP038

This is my entry into this week's Global Design Project sketch challenge. 
http://www.global-design-project.com/2016/05/global-design-project-038-sketch.html
Click on this image to link to GDP038 - see all the wonderful projects and maybe enter yourself

I used a gold and white sheet from the Pop of Pink DSP pack  and decided to combine it with Melon Mambo for no better reason than other sheets in the pack feature that colour!
Stampin Up Australia, #thecraftythinker, #GDP038, Botanical builder, Stampin Up Australia Demonstrator
A bright, cheerful card for GDP038

I have also used Basic Black cardstock and ink and some Gold Foil Sheet.  I made the flowers with the Botanical Builder framelits and the banner is made with the Thoughtful Banner stamp set and matching Duet Banner Punch (available as a bundle to save 10%).  The Sentiment is from the Teeny Tiny Sentiments stamp set.

I shaped the ends of the black and gold strips with one of the Lots of Labels framelits using this method.

Thank you for your visit!

'Til next time
Stephanie

Product List - To shop in my online store, click on one of the product images below (Australian Residents only)

Friday, 3 June 2016

Ombre Swirly Scribbles

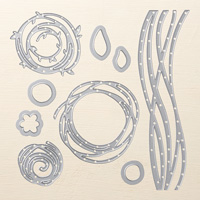
This is such a quick and easy card but, thanks to the Swirly Scribbles thinlit, still has wow factor.

Stampin Up Australia, #thecraftythinker, Swirly Scribbles, Ombre, Quick easy handmade card, sneak peek
Swirly Scribbles are so versatile

I cut the panels to size first and cut and folded the Crushed Curry card base.

I cut the Swirly Scribbles lines from each of the following colours of cardstock:
Delightful Dijon
Crushed Curry
Daffodil Delight
So Saffron

Starting at the bottom, I glued the shapes to the panel - overlapping them a little on the left side.

I then white heat embossed the greeting from One Big Meaning.

I trimmed around the panel with a pair of snips to remove the excess Swirly Scribbles and then adhered the layers to the card base.

So quick!

This card is entered into the Crazy Crafters Project Highlights this week.  Click here to see the other great projects and vote for your favourites!

'Til next time
Stephanie


Product List - To shop in my online store, click on one of the product images below (Australian Residents only)

Wednesday, 1 June 2016

Thank You for Painters Palette


All the waiting is finally over!  All the products in the fantastic new catalogue (best one yet, I think!) are now available for purchase!

The Painters Palette stamp set and the new Layering Squares framelits are just made for each other!

For this card, I stamped the easel from the Painters Palette set with Tip Top Taupe Ink onto Whisper White cardstock.  I then added some shadows with a Soft Suede Stampin Write Marker.

Masking the square of the frame with some scrap paper, I then stamped the "canvas" area to look like a painting.  I used the two step floral spray from the Number of Years stamp set with Mint Macaron, Flirty Flamingo and Watermelon Wonder inks.  I then used matching Stampin' Write Markers to add some shading to the leaves and flowers.


Stampin Up Australia, #thecraftythinker, Painters Palette, Stephanie Fischer Independent Stampin Up Distributor
Love the new Layering Squares framelits!
I used the Layering Squares framelits to create a Flirty Flamingo mat that covers the entire frame area and a narrower Soft Suede frame to sit on top.    I glued these onto the panel.

Using an aqua painter and a touch of Crumb Cake ink, I painted a little bit of shadow under the easel to "ground" it.

I cut a piece of Soft Suede cardstock ... wide and trimmed each end (one end at a time) with one of the Lots of Labels framelits using this technique.  I then cut a piece of Crumb Cake card stock to ...wide and trimmed to a smaller size in the same way.  The greeting is from Gift of Love and is stamped with Basic Black ink.

The rest of the card is just layering.

'Til next time
Stephanie


Product List - To shop in my online store, click on one of the product images below (Australian Residents only)