Thursday 31 December 2015

Occasions 2016 Catalogue Preview - In The Meadow

If you've seen my previous posts (in particular those featuring No Bones About It), you'll know that I love to put little scenes together - so this gorgeous set was a must have for me and I've finally had the opportunity to get inky with it!

This was my first card but I'm sure it won't be my last!
S.U., masculine card, Hand made card
In The Meadow from the 2016 Occasions Catalogue
Products from the new Occasions Catalogue are available for purchase from 5th January (very soon now!).

Remember that Sale-A-Bration also starts on 5th January and for every $90 you spend you can choose a FREE ITEM from the Sale-A-Bration catalogue.  If you don't have catalogues or a Demonstrator and you live in Australia contact me to get some.

So how did I make this card?
I started by stamping the deer in black and then masking them.
Next I stamped the mountains with Elegant Eggplant and again (without re-inking the stamp) slightly above and to the left and then a third time in between to create a range of mountains disappearing into the distance.

I coloured the mountains with sponge daubers and Wisteria Wonder ink (for the more distant mountains) and a light coating of Elegant Eggplant .  I used a little more ink in places for shadows and crags.

I used a sponge dauber and Pear Pizzazz ink to create grasslands - getting lighter near the mountains to give an impression of distance.

I added Mossy Meadow and Early Espresso inks to the tree stamp using Stampin' Write Markers  and then stamped the trees (twice).

At this point I removed the mask from the deer and watercoloured them with Delightful Dijon and Soft Suede inks.

I stamped the grass image with Pear Pizzazz in the foreground and lightly stamped this off heading towards the mountains a bit to give a bit of texture to the grasslands.

I then used the same grass stamp with Mossy Meadow to add some shadowy depth to the foreground (especially under the trees) and sponged a little Mossy Meadow to the bottom edge to finish giving depth to the foreground.

I used a sponge dauber and Soft Sky for the sky and then added a little Marina Mist to the top  edge.

The sentiment is from the same stamp set and I placed it in the grasslands with black ink.

The stamped panel was matted onto Mossy Meadow cardstock and then placed onto the Old Olive card.
S.U., masculine card, Hand made card
Close up of the lovely deer
Well, this is my last post for this year - see you in 2016 and I wish everyone a wonderful New Year!
Stephanie
Built for Free Using: My Stampin Blog

Wednesday 30 December 2015

Sale-A-Bration 2016 Preview - Honeycomb Happiness

I can't believe it's Sale-A-Bration time of year again!  And it's a really good one - this year there are lots of great products available FOR FREE with a qualifying purchase (one free product with every $90 you spend).

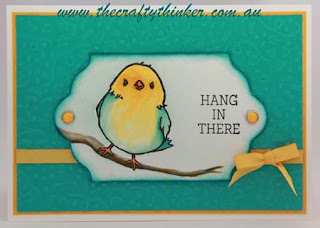
I've been playing with the little bird from the Honeycomb Happiness stamp set (141291).  I don't have the Honeycomb Embellishments (140566 in the new Occasions Catalogue) that are designed to sit very nicely on the little bird's chest, so I've just been watercolouring.  
SU, saleabration 2016, Confetti Embossing Folder, S.U., Watercolouring technique
Blackberry Bliss and Melon Mambo version on Shimmery White card 
Although I'm still not completely happy with my results - I thought I'd better share before it's no longer a preview!  Only 6 days until the start of Sale-A-Bration and the new Occasions Catalogue! Yay!
SU, saleabration 2016, Confetti Embossing Folder, S.U., Watercolouring technique
Pool Party and Crushed Curry (retired ribbon) on Whisper White
I hand-drew the twig
I've also used some products from the new Occasions Catalogue:
Confetti embossing folder (140592) 

It's My Party Enamel Dots (140554) which I've placed on Candy Dots bases
Shimmery White Cardstock (121717)

Sale-A-Bration is also a REALLY good time to join as a demonstrator if you'd like to get your hands on the great Stampin' Up! products at the discounted demonstrator prices or even build a business.  Until 31st March you can build your own Starter Kit with a value of $295 for only $169!!  That's a massive saving!  If you live in Australia and would like to join contact me or click on the image below.


If you'd like an excuse to meet up with your friends - host a qualifying party until 31st March and earn an extra $40 (with $400 in party sales) to put towards the products you'd like to have. If you live in Australia - contact me to discuss options. 

Built for Free Using: My Stampin Blog

Sunday 20 December 2015

Crazy Crafters and Pootlers Blog Hop December 2015 - Occasions Catalogue Sneak Peek

Welcome to the Crazy Crafters Blog Hop for December. This is a very exciting Blog Hop - it's international - since we have the opportunity to mix with a wonderful and talented group called the Pootlers who are based in the UK. This month we are providing sneak peeks at the products in the new Occasions Catalogue. We hope you like our choices and find great inspiration from the projects.

You may just be starting the blog hop here at my blog - Stephanie Fischer, The Crafty Thinker - or you may have come from the person before me in the list. If you get off track at any time, the full lineup below will help you to move along from blog to blog so that you see all of the projects.
SU, 2016 Occasions Catalogue, New Occasions Catalogue, out of the box technique
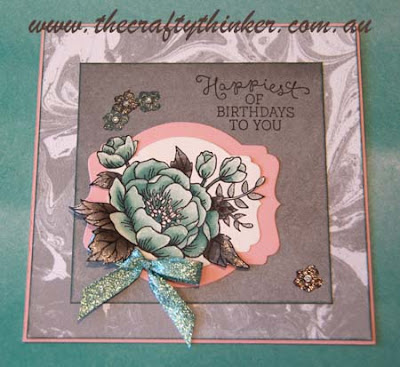
Birthday Blooms stamp set & Perfectly Artistic DSP available from 5th January 2016
.
We are also combining our hop with a challenge of sorts - we were challenged to use just one: just one ink, one stamp set, one DSP set etc.  It was a great learning experience for me - I hadn't realised just how much I normally rely on using a mix of colours.  BUT there's sooo much to love in the new Occasions Catalogue that this imposed discipline really was a good thing!

My Just One is:
  • The Birthday Blooms stamp set (140658 available 5th January 2016 from the Occasions Catalogue)
  • Pool Party Glitter Ribbon (140561 available 5th January 2016 from the Occasions Catalogue)
  • Deco Labels Collection Framelits
  • Pool Party Ink
  • Perfectly Artistic DSP (141021 available FREE from  5th January to 15th February 2016 with an order of $90 of products)
To this I added a little black ink and some basic rhinestone jewels.
SU, 2016 Occasions Catalogue, New Occasions Catalogue, out of the box technique
Close up of the Wink of Stella glitter on the flowers
The glittery effect on the petals and leaves comes from the new Wink of Stella Glitter Brush in clear (141897 available 5th January 2016 from the Occasions Catalogue).  I LOVE this product because it makes it so easy to apply the glitter to exactly the spot you want it!

I stamped the flower onto Shimmery White cardstock (121717 available 5th January 2016 from the Occasions Catalogue) and watercoloured it using the Pool Party and black inks - I'm so excited about this cardstock and much prefer it to watercolour paper.

I hope you've enjoyed this card and I welcome your comments. 
SU, 2016 Occasions Catalogue, New Occasions Catalogue, out of the box technique
The Pool party glitter ribbon is just gorgeous.  The DSP is edged with Pool Party ink to match.
Thanks for taking part in our blog hop. Remember that currently you are at my blog - Stephanie Fischer - so check the blog hop line up list to see who is next in the list and click on their name as you don't want to miss out on seeing any of the blogs and the amazing inspiration they contain.

'Til next time
Stephanie
                                               
Sam Hammond Donald

Sunday 13 December 2015

Bloomin' Love - Occasions Catalogue Sneak Peek

Time for a sneak peek at one of the many really great items in the new Occasions Catalogue - available 5 January 2016.

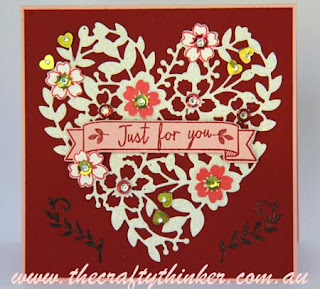
This is the Bloomin' Love stamp set and the Bloomin' Heart thinlits dies which are available as a bundle at a saving of 15%.
SU, Large Numbers Framelits, Bloomin' Love Bundle
Bloomin' Love Bundle with the First Sight stamp set
NEW PRODUCTS FEATURED: (available from 5th January 2016)
  • Bloomin' Love Bundle                     140818
  • First Sight stamp set                      140688
  • Wink of Stella Clear Brush              141897
  • Large Numbers Framelits                140622
This is in fact a gift card - I didn't take a picture but inside there is a pop up gift card holder.  It's amazingly sparkly and over-the-top but I think just right for a Christmas gift card present for my lovely niece.

The main card is made from Blushing Bride cardstock to which I've added a layer of Cherry Cobbler.  I stamped an image in black ink from another new stamp set called First Sight and then I mirror stamped it on the other side.  Once the ink was dry I added a little sparkle with the Wink of Stella Clear brush (also in the new Occasions Catalogue).

I used the Bloomin' Heart thinlit die to cut the large heart from Dazzling Diamonds Glimmer Paper.  I stamped the flowers from the Bloomin' Love stamp set onto Whisper White cardstock with Watermelon Wonder ink and cut them out with the small dies from the Bloomin Heart Thinlits and stuck them onto the larger heart.

I stamped the banner from the Bloomin' Love stamp set in Cherry Cobbler ink onto Blushing Bride cardstock and added a sentiment from Watercolor Wings (currently available in the Annual Catalogue).  Then I cut out the banner with the matching die from the Large Numbers Framelits die set and stuck it onto the heart.

The finishing touches were the sequins from the Brights Sequin Assortment and I placed a small Rhinestone Jewel (both currently available in the Annual Catalogue) in the centre of each.

Stay tuned for more sneak peeks!
Stephanie
uilt for Free Using: My Stampin Blog

Sunday 29 November 2015

Sleigh Ride and Festive Fireplace

I'm so sad that these products are being retired - they've been a wonderful and versatile addition to my stash this Christmas!  Now that I know they won't be around much longer, I'm using them mor than ever!
SU, Xmas Card, Centre Panel Card, Sleigh Ride, window, www.thecraftythinker.com.au
Centre panel card, sponged sky with silver glitter stars from the Confetti Stars Border punch

If you don't have these sets yet, and would like them, it might be a good idea to buy them as soon as you can in case stock runs out.  Just click on the image of the product at the bottom of this post  - it'll link you to my shop.

The greeting is from the To You & Yours Too set which is also retiring.

If you'd like more information about retiring products or if there's anything else you'd like to ask me - please contact me.

'Til next time
Stephanie
Built for Free Using: My Stampin Blog

Saturday 28 November 2015

Snowmum Shaker Card

SU, Christmas card, Xmas, Shaker Card, Sponging, Masking, www.thecraftythinker.com.au
The glitter in the shaker falls into interesting snow falls
I came over all adventurous yesterday and made my first shaker card!  I've been thinking of improvements ever since but, meanwhile - here it is!

http://www.global-design-project.com/2015/11/global-design-project-gdp012.htmlI have decided to enter it into this week's Global Design Project #GDP012 since Brian King's lovely card inspired me to use the Snow Place stamp set.
SU, Christmas card, Xmas, Shaker Card, Sponging, Masking,www.thecraftythinker.com.au
A little bit of masking and stamping with the Snow Place stamp set

 I've called it my Snowmum card because of the comforting arm/stick around the little snowman.  My niece had been visiting with her new baby and all the cuteness must have affected me!

SU, Christmas card, Xmas, Shaker Card, Sponging, Masking, www.thecraftythinker.com.au
The inside of the card

Built for Free Using: My Stampin Blog

Sunday 15 November 2015

Crazy Crafters Blog Hop November 2015 - My Most Used Stamp Set


Welcome to the Crazy Crafters Blog Hop for November. This month we are showcasing our most used stamp set! We hope you like our choices and find great inspiration from the projects.

You may just be starting the blog hop here at my blog - Stephanie Fischer, The Crafty Thinker - or you may have come from the person before me in the list. If you get off track at any time, the full lineup below will help you to move along from blog to blog so that you see all of the projects.

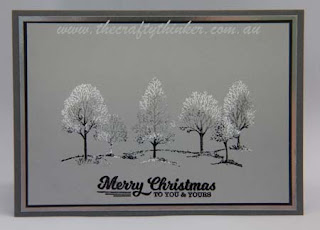
My most used stamp set would have to be Lovely As A Tree!  It was my first stamp set purchase and remains one of my all-time favourites!  It really gets a work-out because it's just so versatile - it's equally suitable for Christmas cards, birthday cards (masculine or feminine), sympathy cards ... pretty much everything really and it also lends itself very well to many different techniques and so it can look very different, depending on the techniques and/or colours you use.
SU, Heat Embossing, Christmas Card, hand made
Lovely as a tree painted with embossing powders. Greeting from Six Sayings

I created these cards by "painting" with embossing powders - and a lot of fun it was too!  First I stamped the image with Versamark and then I very carefully sprinkled small amounts of three different embossing powders roughly where I thought I'd like them.  I tipped the card down to remove the excess powder and so the tops of the trees remained very white and little bit of "snow" fell onto the ground too. Then I tapped off any excess and used the heat tool. 

For a great tutorial on the technique see Sandi McIver's PDF here.

In this one, I used black, gold and white on Sahara Sand cardstock which I layered with Elegant Eggplant and Gold Foil cardstock.


I wanted the tree trunks and bases of the trees to be darker and the tops of the trees to be lighter and so I concentrated my embossing powders accordingly.

SU, Heat Embossing, Christmas Card, hand made
For this card, I used black, silver and white embossing powders on smoky slate cardstock (layered with black, Basic Grey and Silver Foil cardstock). 
  
SU, Heat Embossing, Christmas Card, hand made
Another version in gold
 

SU, Heat Embossing, Christmas Card, hand made


One of the joys (and sometimes frustrations!) of this technique is that it looks different every time!  Here are a couple of other cards to show you what I mean.

I hope you've enjoyed these cards and I welcome your comments. 

Thanks for taking part in our blog hop. Remember that currently you are at my blog - Stephanie Fischer - so check the blog hop line up list to see who is next in the list and click on their name as you don't want to miss out on seeing any of the blogs and the amazing inspiration they contain.


Built for Free Using: My Stampin Blog

Thursday 12 November 2015

Christmas card - To You & Yours Too

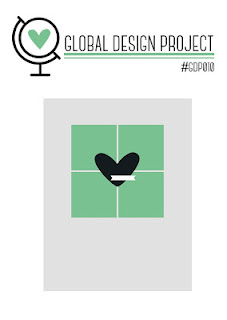
Time is not my friend at the moment so I was very excited to complete a card to enter into the latest Global Design Project challenge!  This is GDP010 - click the image for the link to join in or see all the lovely entries.
http://www.global-design-project.com/2015/11/global-design-project-gdp010.html?showComment=1447187062043
And this is my card using the To You &Yours Too stamp set, some masking and sponging.
SU, Global Design Project, Heat & Stick, Delicate Ornament Thinlits, sponging
My entry for #GDP010: To You & Yours Too, Delicate Ornaments Thinlits, Masking & Sponging
To go with the moonlight theme, I stamped the black cardstock with versamark using the little stars from the stamp set and heat embossed with Heat & Stick before sprinkling with Dazzling Diamonds glitter.

I masked the moon with a circle of scrap paper (I made it sticky but removable with some 2-Way glue) before sponging with Soft Sky, Pool Party, Pacific Point, Night of Navy and a tiny touch of black.  Then I removed the mask and stamped the main image from the stamp set with Archival black ink.  I then cut out the image with one of the Delicate Ornament Thinlits and sponged the edge with a little black.

The ornament top and hook are cut from Silver Foil with dies from the same set.

I stamped the banner from the Project Life Hello December 2015 stamp set and coloured between the lines with my Pool Party Stampin' write marker (although it's a bit hard to see in the photo).  I manipulated the photopolymer greeting from the Happy Scenes stamp set so that it followed the shape of the banner and stamped with Pacific Point ink.  Then I fussy cut the banner.

The squares are Pacific Point cardstock layered onto Pool Party. The main card is also Pool Party.

I had so much fun with this that I went on to make several more cards using the same stamp set and similar technique: some sunsets and some moonlight.  I added the sled & reindeer image from Cozy Christmas and to some of them I added the trees from the Wonderland stamp set.

SU, masking & sponging, sunset background
Crushed Curry, Tangelo Twist, Cajun Craze, Bermuda Bay, Night of Navy, Black
SU, masking & sponging, Moonlight background, moonlit,
Soft Sky, Pool Party, Night of Navy, Black.  Main image in Basic Grey

Built for Free Using: My Stampin Blog

Sunday 1 November 2015

Christmas cards with heat embossing & bleaching

I thought I'd quickly share what we'll be doing in the next Tuesday class.  We'll be heat embossing and discussing different effects that can be achieved using heat embossing. 

Then we'll be painting our embossed images with bleach.  We'll then use inks to colour some of the images.

This is the first card that we'll be making together:
SU, Delicate Ornaments Thinlits Dies, Curvy Corner Trio Punch, Emboss Resist
Cozy Christmas - heat embossed then bleached
We'll create the top layer (that hopefully brings snowflakes to mind) with the Emboss Resist technique - clear embossing on Whisper White and sponging with Smoky Slate.

We'll die cut the ornament shape from the centre of the card (keeping the ornament die cut for another project!).

The image from Cosy Christmas is heat embossed with black onto Marina Mist cardstock. 

Using a small soft brush, household bleach is applied to the trees, roof, windows and chimney smoke.  Here I used 4 applications of bleach, drying with a heat tool between applications to check on the level of bleaching achieved.  I heated from the back of the paper to preserve the embossing.

I also applied bleach to the foreground to look like snow.  I painted it onto the card in a streaky sort of way to create interest and look more "scenic" and I also applied less bleach closer to the cottage to create some depth.

The corners of the card and the spotty layer were punched using the Curvy Corner Trio Punch.

I centred the ornament cut out over my scene, trimmed off any stray edges and then layered it onto the Basic Grey card.  

I finished it off with a few Rhinestone Jewels and a little bit of white ribbon from my stash.

I have entered this into the November link up at Just Keep On Creating - anything goes and it's a fun way to share creativity.  Click on the image to have a look.
http://justkeeponcreating.blogspot.com.au/

SU, Delicate Ornaments Thinlits Dies, Curvy Corner Trio Punch
Cozy Christmas again but without the emboss resist layer


I also made a slightly simpler version without the emboss resist technique - just in case time is tight!  You can see that I used more bleach in this one.
SU, Delicate Ornaments Thinlits Dies, Curvy Corner Trio Punch,
Santa's Gifts, bleached then coloured
SU, Delicate Ornaments Thinlits Dies, Curvy Corner Trio Punch,
Close up of the tree
If time allows we'll also make something like this card which will allow us to colour in our image after we've bleached it. 

The tree image is from the Santa's Gifts set and I coloured it using Stampin' Write Markers in Pear Pizzazz, Garden Green, Daffodil Delight, Real Red, Chocolate Chip, Hello Honey and Cherry Cobbler. 

To create the stars, I punch a little bit of left over Dazzling Diamonds Glimmer Card with the Confetti Stars Border Punch and glued on some of the resulting little stars with the Fine-Tip Glue Pen.

The emboss resist background is a bit bright but I wanted to offset the rather muted tones in the ornament (I used the same piece of Marina Mist cardstock  for both cards to save time!).  The colours in the background are Daffodil Delight and Watermelon Wonder.  The bow is Calypso Coral Seam Binding Ribbon and the ornament is "hanging" from a little piece of silver Cording Trim.

I also made this, slightly more advanced, card using heat embossing and bleach.  The images are from Happy Scenes, Wonderland and White Christmas.  The snow is stamped with bleach using  one of the little stamps from Sheltering Tree.  To create the trees in the background, I used the same stamp twice but the second time, I masked out one of the trees.
SU, Wonderland, Happy Scenes
Scene creating using heat embossing & bleach: Wonderland, Happy Scenes, White Christmas
I'll be back soon to show you some cards I've made by "painting" with embossing powder.

Thanks for visiting.
Stephanie


Built for Free Using: My Stampin Blog

Friday 30 October 2015

Birthday Blossoms #GDP008

Birthday Blossoms

This week I have entered into the Global Design Group Challenge -GDP008 which calls for us to CASE a beautiful card designed by Kylie Bertucci.

Click on the picture to see all the beautiful entries to this challenge or enter yourself
I also entered the card into the Just Keep On Creating link up for November - anything goes
http://justkeeponcreating.blogspot.com.au/
Click on the image to see all the other entries or enter yourself

 This is the card that I have made using the Birthday Blossoms stamp set.  The colours are So Saffron and Chocolate Chip with Whisper White

SU, Birthday Blossoms, Global Design Project 008, Triple Banner Punch
Birthday Blossoms for my entry to GDP008
 I stamped the background layer with the small flowers using So Saffron ink, stamped off first.  The flowers are stamped with Chocolate Chip onto So Saffron and watercoloured a little with Chocolate Chip.  The large flowers are punched out with the matching Pansy Punch.  The circular label is stamped with Chocolate Chip and sponged with So Saffron and Chocolate Chip.

I enjoyed making it so much that I decided to make some similar ones!

Until next time.
SU, Birthday Blossoms, Global Design Project 008, Triple Banner Punch
Masculine version using Guy Greetings Stamp Set
SU, Birthday Blossoms, Global Design Project 008, Triple Banner Punch
This one is Basic Grey & Soft Sky


SU, Birthday Blossoms, Global Design Project 008, Triple Banner Punch
Elegant Eggplant and Pink Pirouette

Built for Free Using: My Stampin Blog

Sunday 18 October 2015

Crazy Crafters Blog Hop October 2015 - Fun Fold


Welcome to the Crazy Crafters Blog Hop for October. This month we are excited to show off some amazing fun folds. We hope you find great inspiration from the projects.

You may just be starting the blog hop here at my blog - Stephanie Fischer, The Crafty Thinker - or you may have come from the person before me in the list. If you get off track at any time, the full lineup below will help you to move along from blog to blog so that you see all of the projects. At the moment you are visiting Stephanie Fischer, The Crafty Thinker.

I'm a bit in love with easel cards at the moment!  They're so easy but effective and they make a nice display for the lucky recipient of the card.  There are many good tutorials available for easel cards and I don't really know to whom I should give credit for this great fun fold but, whoever you are, thank you!

The colours in this easel card are Smoky Slate, Elegant Eggplant and Wisteria Wonder.   
 
SU, Easel Card, Tags & Labels framelits, snowflakes, Pillow Top Card
Flurry of Wishes Easel Card
 For the snowflakes I used the Flurry of Wishes stamp set (from the Holiday Catalogue), stamping with Versamark onto Silver Foil and heat embossing with Silver Embossing Powder before punching out with the matching Snow Flurry Punch.  I then used Dimensionals to adhere them to the card and placed a Rhinestone Jewel in the centre of each one.
SU, Easel Card, Tags & Labels framelits, snowflakes, Pillow Top Card
Closed position

The greeting is from the Lots of Joy stamp set (in the Annual Catalogue), which I stamped onto Smoky Slate card and cut out with the Tags & Labels Framelits.  I added a layer of Elegant Eggplant cut with a larger Tags & Labels framelit and placed it onto the card front with dimensionals.

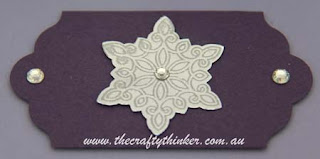
To create the Elegant Eggplant label that supports the easel, I cut a rectangle and then made decorative ends using the Tags & Labels framelits and the method I described in this blog post.   
SU, making a symmetrical label with Tags & Labels framelits
Symmetrical label from Tags & Labels framelits
I'd like to thank Sheri Pearson at Inkspirations for the inspiration and technique tutorial for the pillow top panel.  Click here to see her tutorial.   

SU, Easel Card, Tags & Labels framelits, snowflakes, Pillow Top Card
Pillow top background inspired by Sheri at Inkspirations
Following Sheri's tutorial, I scored the pattern onto the Wisteria Wonder cardstock.  Then I folded each score line and inked both sides of the fold with Wisteria Wonder ink.

I layered this decorative panel on to Elegant Eggplant before adding it to my Smoky Slate Easel front.  Once all my elements were in place, I added a dab of Dazzling Details to each intersection of the lines.  I was rushing a bit and didn't do a very neat job but it doesn't seem to matter as much as I feared it would.  I'll do better next time!

I hope you've enjoyed this card and welcome your comments.

Thanks for taking part in our blog hop. Remember that currently you are at my blog - Stephanie Fischer - so check the blog hop line up list to see who is next in the list and click on their name as you don't want to miss out on seeing any of the blogs and the amazing inspiration they contain.


Built for Free Using: My Stampin Blog

Thursday 24 September 2015

Stencilled glitter Christmas cardsI

SU, Christmas card, Happy Patterns stencils, Jac paper
Everything except the glitter is from Stampin' Up!
This is a card that I made as a sample for one of the lessons in the nine week course I'll be teaching soon.

It uses die cutting and embossing using the Big Shot and a fun but messy technique with glitter!

To create the glittery ornament I first die cut a piece of double sided adhesive Jac paper using the Delicate Ornaments Thinlits Dies.  Having adhered one side to my label, I then peeled off the protective backing to reveal the sticky film.

I put a little soap onto the back of my stencil (in this case I used one of the Happy Patterns stencils) and placed it - soap side down - onto the sticky die cut (the soap is to make it easy to remove again).

Next I sprinkled on my first colour of glitter (in this case purple).  I rubbed it in well (burnished it) with my finger before removing all the excess glitter with a large, soft brush.  It's important to use ultra fine glitter for this technique.

The next step was to carefully remove the stencil, revealing the remaining sticky parts, which I then coated with the second colour of glitter (green) and rubbed in with my finger.  Don't worry - if you're careful to remove all the excess glitter, you won't up end up with contaminated glitter.

The last step was to add the little ornament top and a bow using the new glitter ribbon.

Here's another card I made using this glitter technique but this time I used one of the dies from the Delicate Ornaments set as the stencil.  The sentiment is from the matching Embellished Ornaments stamp set (available as a bundle with a saving of 15%).

SU, Christmas card, Happy Patterns stencils, Jac paper, Centre Step card
I used a die as the stencil when I added the glitter to the ornament
My nine week course is being held at Learning in the Hills, Baulkham Hills starting Tuesday 13th October.  Places are limited so if you'd like to attend call to book your place:  (02) 9639 7918
 
Built for Free Using: My Stampin Blog

Sunday 20 September 2015

Crazy Crafters Blog Hop September 2015 - Holiday Catalogue - Poinsettia


Welcome to the Crazy Crafters Blog Hop for September!  

You may be just starting the blog hop here at my blog or may have come from the person before me in the list below.  If you get off track at any time, the full line-up below will help you move along from blog to blog so you see all the projects.  At the moment you are visiting Stephanie Fischer, The Crafty Thinker.  

This month we are excited to showcase some of the fantastic new products in the Holiday Catalogue - what a feast!  

Where has the time gone?!!  The year is disappearing so quickly and many of us are already well into the joyous swing of Christmas/Seasonal Card  production!  I love this time of year.  Christmas cards seem to not only condone but encourage the use of bling, glitter and glitz and I can be as over the top as I like!
SU, Festive Flower Builder Punch, Poinsettia, Christmas card, Versatile Christmas
Easel Card featuring a poinsettia created with
the the Reason for the Season Bundle

Having said that, the card I've chosen to include in this blog hop is really quite restrained (for me!) and I decided not to use traditional Christmas colours - I think I haven't quite reached the red and green stage of the year yet! 

 For some reason, I'm making a lot of easel cards these days.  Maybe because they look quite impressive even though they're so quick and easy to make!

I made the card in Tip Top Taupe and added a panel of Early Espresso followed by a panel of Dazzling Diamonds Glimmer Paper.  

I stamped and punched two poinsettias using the Reason for the Season Bundle (a 15% saving as well as everything I need to make a beautiful flower!) and then intermingled the parts - one I stamped with Early Espresso on Tip Top Taupe card
SU, Festive Flower Builder Punch, Poinsettia, Christmas card, Versatile Christmas
Dimensionals add enough height to
keep the card propped open. 
 and the other I heat embossed with Gold onto Early Espresso Card.  I put a Metal Rimmed Pearl in the centre for a little more restrained bling. 

The sentiments are from Versatile Christmas - heat embossed in Gold onto Tip Top Taupe card and die cut with the Project Life Cards & Labels Framelits.

I "prettied-up" the strip of glimmer paper on the inside by trimming the ends with the smallest of the Deco Labels Collection Framelits.
SU, Festive Flower Builder Punch, Poinsettia, Christmas card, Versatile Christmas
Alternative colours for the card

Then I used the other poinsettia to make a second, similar card.

Afterwards I wished I'd mixed up the petals even a little bit more.

I hope you've enjoyed these cards, I would really welcome your comments.

Thanks for taking part in our blog hop, there are so many amazing ideas and so much inspiration that you don't want to miss.  Remember that currently you are my blog - Stephanie Fischer - so check the blog hop line up list to see who is next in line in the list and click on their name as you don't want to miss out on seeing any of the blogs and the amazing inspiration they contain.


Built for Free Using: My Stampin Blog