Monday, 3 October 2016

Metallic Merry Tag Trio

I couldn't resist another card with copper baubles!

Stampin Up, #thecraftythinker, Merry Tags, Christmas Card, Xmas Card, Pine Bough embossing folder, Stampin Up Australia Demonstrator
The little snowflake is from the middle of one of the Christmas Stockings Thinlits

The card is an A5 piece of Basic Gray folded in half.  There's a layer of Silver Foil Sheet and then a final layer of Basic Gray that was embossed with the Pine Bough embossing folder.

I used the Layering Circles dies to cut one circle out of Copper and another from Silver Foil Sheets.  I ran these through the Big Shot in the Softly Falling embossing folder to get a dotty texture.  I cut a bauble rim in copper with one of the Merry Tags framelits and glued it to the front of the silver circle.  I already had the top half of a Merry Tag in silver left over from a previous card and glued that to the copper circle.

I cut the more elaborate Merry Tag from Silver Foil and used the circular die in the set to cut some copper which I glued to the centre of the bauble.

To obtain the pretty little snowflake for the centre of the bauble, I used a scrap of Silver Foil and cut it with a die from the Christmas Stockings Thinlits (one of the stockings has the snowflake in the centre of it).

I used Gold twine from the Bakers Twine Trio Pack to hang the baubles from a piece of Silver Foil cut with a Cheerful Tags framelit.

Thank you for visiting.
'Til next time!
Stephanie


Product List - To shop in my online store, click on one of the product images below (Australian Residents only)

Sunday, 2 October 2016

Christmas Stockings and Merry Tag

This card started with the little silver reindeer that was leftover from this card!

Stampin Up, #thecraftythinker, Christmas Card, Xmas, Christmas Stockings, Merry Tags, Stampin Up Australia Demonstrator, Castle Hill NSW
The little silver reindeer was a leftover from a previous card, cut from another Merry Tag bauble
  
The Basic Gray card is 51/2" square, layered with Silver Foil Sheet, Warmth & Cheer Designer Series Paper and a final layer of Basic Gray.

The Christmas Stockings are cut in Silver and Copper Foil with tops of Fancy Frost Specialty paper.

The Merry Tags bauble is cut in Copper Foil Sheet with a Whisper White backing cut with one of the Layering Circles framelits.  I glued the little silver reindeer to the centre of the bauble.

The three main elements are "suspended" from the Noel banner from the Christmas Stockings Thinlits which is decorated with holly, cut with dies from the same set, of Cucumber Crush and Red Foil.  Unfortunately the red foil is now retired - but I seem to still have LOADS of it.  

Thank you for visiting.
'Til next time!
Stephanie


Product List - To shop in my online store, click on one of the product images below (Australiann Residents only)

Saturday, 1 October 2016

World Card Making Day Blog Hop


Welcome to our World Card Making Day Blog Hop using current Stampin' Up!® Products. This is such a fantastic way to celebrate this event with lots of amazing inspiration for you. You are currently visiting my blog - Stephanie Fischer in Australia and you will be visiting lots of different places in your hop today. There is a list at the end of the page which will help you to move along from blog to blog so you see 20 amazing projects all up.

I just adore the Paisley Suite of products and use them every chance I get!  Today I've used them to create a magic card.

Stampin Up, #thecraftythinker, Magic Card, Paisleys & Posies, Fun Fold, Stampin Up Australia Demonstrator, Castle Hill NSW
Lack of time led to impatience which caused some lifting of the Stazon Ink - Lesson learned!
 
Stampin Up, #thecraftythinker, Magic Card, Paisleys & Posies, Fun Fold, Stampin Up Australia Demonstrator, Castle Hill NSW
Pulling on the tab reveals the paisley pattern in all its colourful beauty!

Stampin Up, #thecraftythinker, Magic Card, Paisleys & Posies, Fun Fold, Stampin Up Australia Demonstrator, Castle Hill NSW
Hey presto!  The colourful image.

 Base Card:
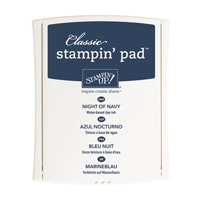
To make the base card, I cut a 12" square of Night of Navy cardstock in half to 12" x 6" and scored and folded it in half at 6".  I then added a 5.75" square layer of Petals & Paisleys Designer Series Paper.  I attached the magic part of the card to the centre of the paisley layer.


The Magic Card Section:
To make the magic section of card, I basically followed the great video tutorial by Brandi Barnard with a few little changes.  

I cut a piece of Rich Razzleberry cardstock to 12" x 4.5".  Like Brandi, I scored one side of the cardstock then measured 4.5" from the score line and scored again.  I also followed Brandi's suggestion to create a bit of depth for the mechanism.  

I decided I wanted a smallish frame of Rich Razzleberry around the stamped image and so I made it 1cm wide - not to be confusing but because the vertical ruler on my Stampin' Trimmer is metric only!  So I cut the centre from the front of the magic card, leaving a 1cm edge on all sides.

One of the other changes I made was to add a piece of Very Vanilla cardstock to the centre of the mechanism rather than use another piece of Rich Razzleberry.  I cut the Very Vanilla piece 1/8" smaller just to make my life a little easier!   

Then I simply followed Brandi's instructions to finish the magic card.  I used Fast Fuse to stick it to the card base to better withstand all the excited playing with the magic!
Stampin Up, #thecraftythinker, Magic Card, Paisleys & Posies, Fun Fold, Stampin Up Australia Demonstrator, Castle Hill NSW
The addition of colour makes so much difference!

The Stamping & Colouring:
To create the stamped image for the magic card, I used a variety of the stamps in the Paisleys & Posies stamp set with Basic Black Archival Ink onto Very Vanilla cardstock, masking as I went.  I coloured the images with a variety of Stampin' Write Markers (Mint Macaron, Delightful Dijon, Night of Navy and Rich Razzleberry).

The masking is a little bit awkward when it comes time to stamp the same images onto the Window Sheet with Stazon ink.  I would recommend using some washi tape to hold the Window Sheet in place and also to leave yourself some drying time for the Stazon before applying a mask and adding the next stamp.  I was a bit short on time and consequently some of the ink lifted when I removed the masks.


Stampin Up, #thecraftythinker, Magic Card, Paisleys & Posies, Fun Fold, Stampin Up Australia Demonstrator, Castle Hill NSW
I added some paisley to the inside of the card too.
The banner:  
I stamped one of the banners from the Basket For You hostess set using Night of Navy ink on Very Vanilla cardstock and cut it out with the matching Bunch of Banners framelit.  I then stuck the banner to a piece of Night of Navy cardstock and trimmed around the edge with my snips.  

I attached the banner to the magic card, being careful  to get the glue dots on the Rich Razzleberry frame and not on the Window Sheet!
 
Thanks for visiting my blog today, there are so many amazing ideas and inspiration you don't want to miss. Remember that currently you are at my blog - Stephanie Fischer, so check the blog hop line up list to see who is next in the list.  Enjoy World Card-Making Day!


'Til next time!
Stephanie


https://www.blogger.com/blogger.g?blogID=9144241970390167696#editor/target=page;pageID=525990664269408313;onPublishedMenu=pages;onClosedMenu=pages;postNum=0;src=link
Click on the image to see a list of applicable products
Product List - To shop in my online store, click on one of the product images below (Australian Residents only)