 |
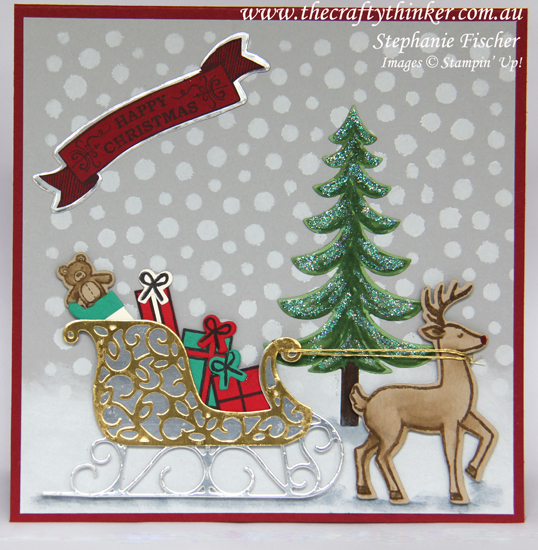
| The dotty Seasonal Decorative Mask is great for creating snowy backgrounds! |
The 6" square card is made from Cherry Cobbler cardstock. The Smoky Slate layer is 1/4" smaller.
Using Whisper White Craft Ink, a sponge dauber and one of the Seasonal Decorative Masks, I inked through the mask to create the snow flakes. Having removed the mask and dried the ink, I sponged more white ink onto the lower part of the card. I used my heat tool on the lower setting to speed up the drying process because white craft ink does take quite a long time to dry.
Meanwhile, I stamped the reindeer and teddy onto Crumb Cake cardstock with Soft Suede ink, cut them out with the matching dies and then shaded them with a little Soft Suede ink and an aquapainter. I gave the reindeer a red nose, so I suppose we should say "hello, Rudolph"! The others must be off playing games somewhere without him!
I stamped the presents and bows with black ink onto scraps of Emerald Envy, Real Red and Whisper White cardstock and cut them out (the bows have a matching die). I then used a guillotine to cut some very thin strips of cardstock and glued them on to the presents as ribbons, gluing the bows onto the top of the presents. I used the stocking die to cut a scrap of Whisper White cardstock and then then with a scrap of Emerald Envy cardstock. I cut off the top part of the green stocking and glued it to the top of the white one, then glued the teddy to the back of the stocking.
 |
| Using dimensionals help bring the sleigh and reindeer into the foreground |
I stamped the tree with Garden Green ink onto Pear Pizzazz cardstock and then cut it out with the matching die. I used Garden Green, Pear Pizzazz and Early Espresso Stampin' Write Markers to colour the tree and then adhered it to the front of the card. I scribbled on some glue with the Fine-Tip Glue Pen and sprinkled on some Dazzling Diamonds glitter.
I cut the sleigh from Silver Foil cardstock and the decorative top part of the sleigh from Gold Foil Cardstock then used the Fine-Tip Glue Pen to adhere them together. Having glued the presents and stocking to the back of the sleigh, I used Stampin' Dimensionals to position the sleigh on the front of the card.
I attached the reindeer with Stampin' Dimensionals and then used a little black ink and an Aquapainter to create some shadows under the tree, sleigh and reindeer.
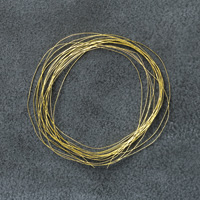
I wanted to add some reins but haven't yet purchased the Bakers Twin Trio, so I plaited together doubled lengths of Gold Metallic Thread. Yes, it was a bit time-consuming .... yet oddly therapeutic!
Using Basic Black ink, I stamped the banner from the Seasonal Bells stamp set onto Cherry Cobbler cardstock and then cut it out by hand. I used the Bunch of Banners framelit to cut some Silver Foil Cardstock, layered the red banner on top and glued the banner to the card front.
Thanks for visiting!
'Til next time
Stephanie
Product List - To shop in my online store, click on a product image below (Australian Residents only)


No comments:
Post a Comment